Hang In There + Spring Cleaning Warehouse Sale

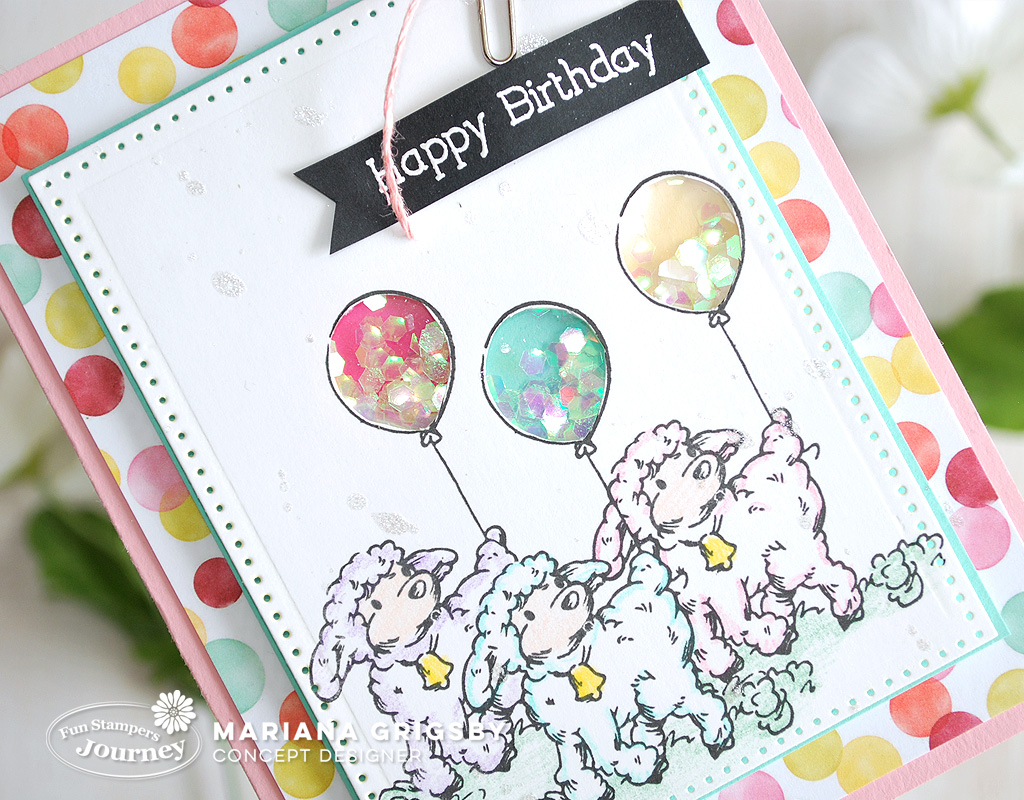
Hello there! I know these past last weeks have been hard for everyone because, spending a lot of time at home can be challenging. In my case, besides doing some organizing and cleaning in home I have also been taking advantage of the extra time making some cards. So, today I am sharing a simple card that I created using one super cute stamp set called: Don’t Hurry, take a look:

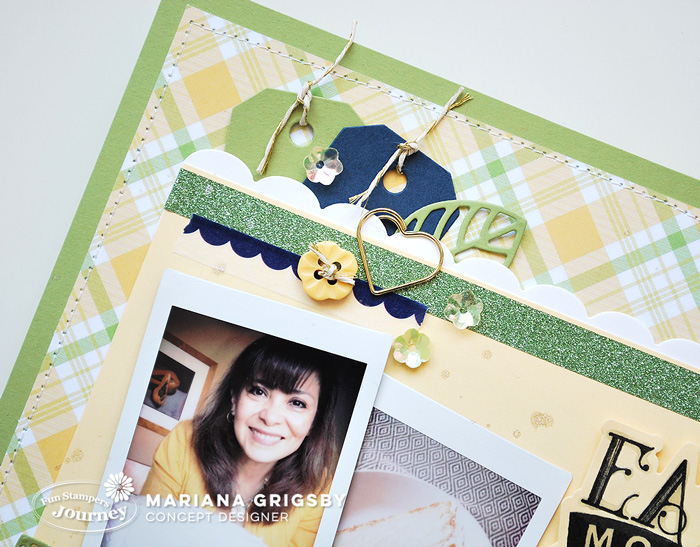
I began by creating the subtle background using a Dauber Dowel Small and Lovely Blue Liquid Color. I wet the dauber with the liquid color and applied it from center towards the edges in a circular motion. I achieved a pretty ombré effect. Then, while the panel was drying, I colored the sloth and branch using my Color Burst Pure Color Pencils. One of the things that I like to do when I am using my color pencils, is to moisten the tip of a Color Burst Blender stick with a product called Gamsol. This product helps to get rid off a little bit of the texture that color pencils leave on paper and it also helps to blend the different tones of colors that you are using.

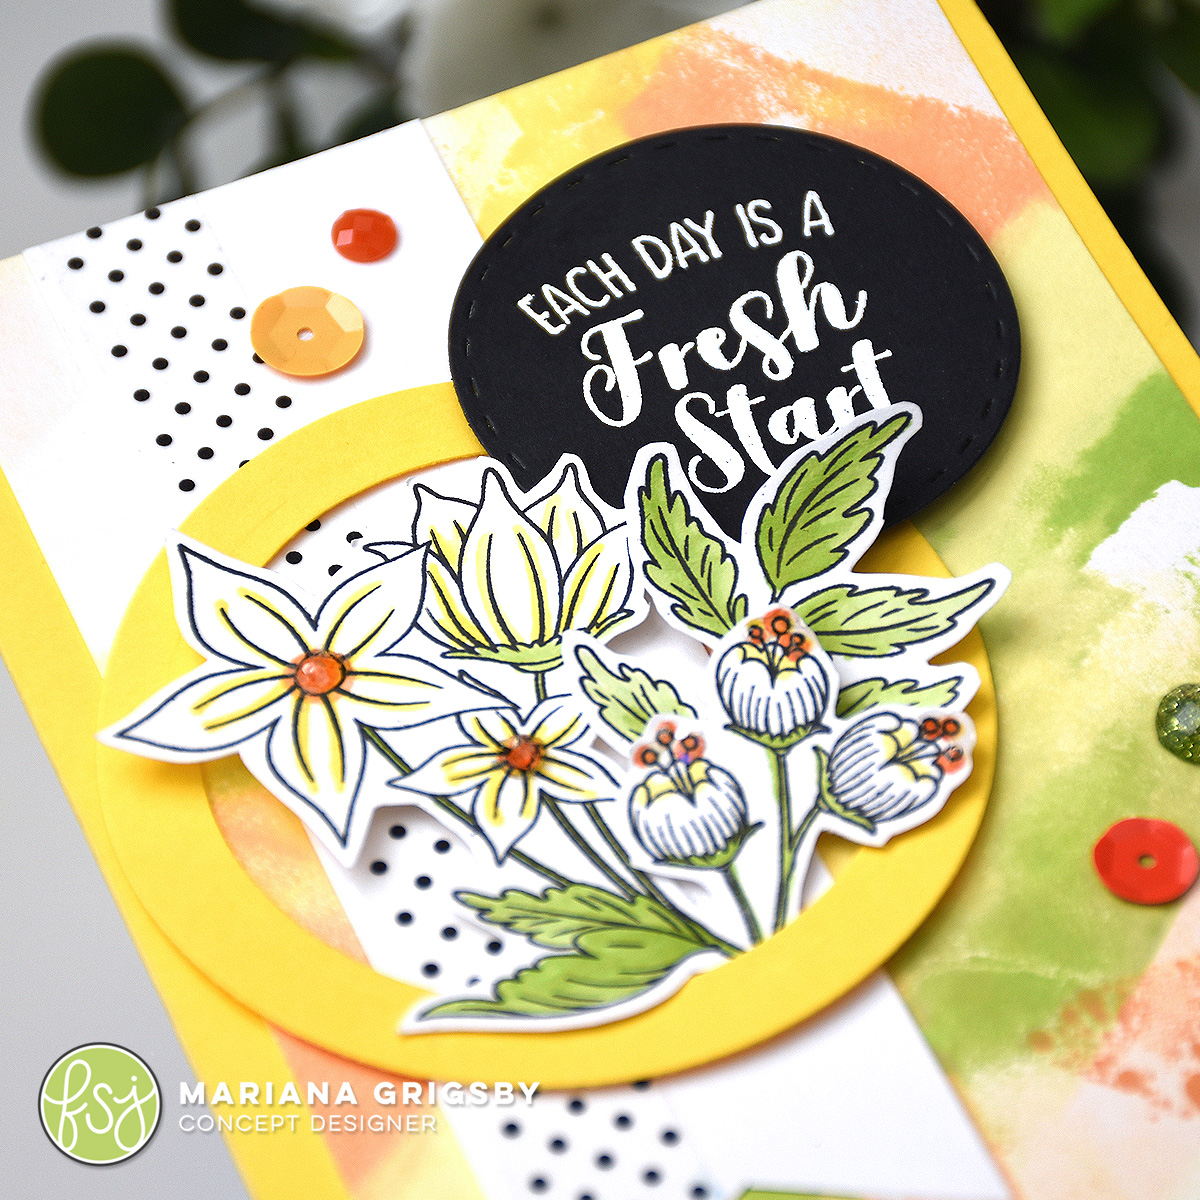
For the sentiment I used a set called Solid-Bet Stamp Set and its Matching Die Set (Outline Bet Die Set). These two products are currently ON SALE at a great price. For this card I stamped the word “hang” and I used part of a sentiment included in the stamp set. I arranged all the elements over the background and I adhered the panel over a folded card. To finish up this card I adhered some small heart stickers.

Please feel free to click on any of the links below to see more details about the products that I used to create my card:

Don’t Hurry Stamp Set | Solid-Bet Stamp Set| Outline Bet Die Set |Liquid Colors | Color Burst Blender | Color Burst Pure Color Pencils | Dauber Dowel Small |

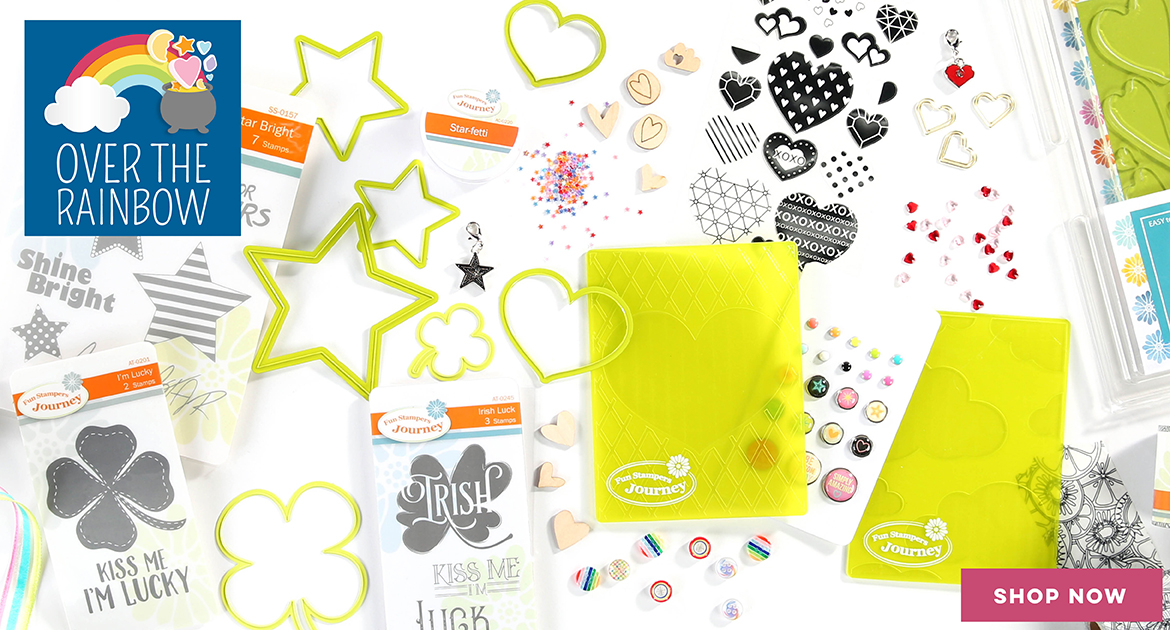
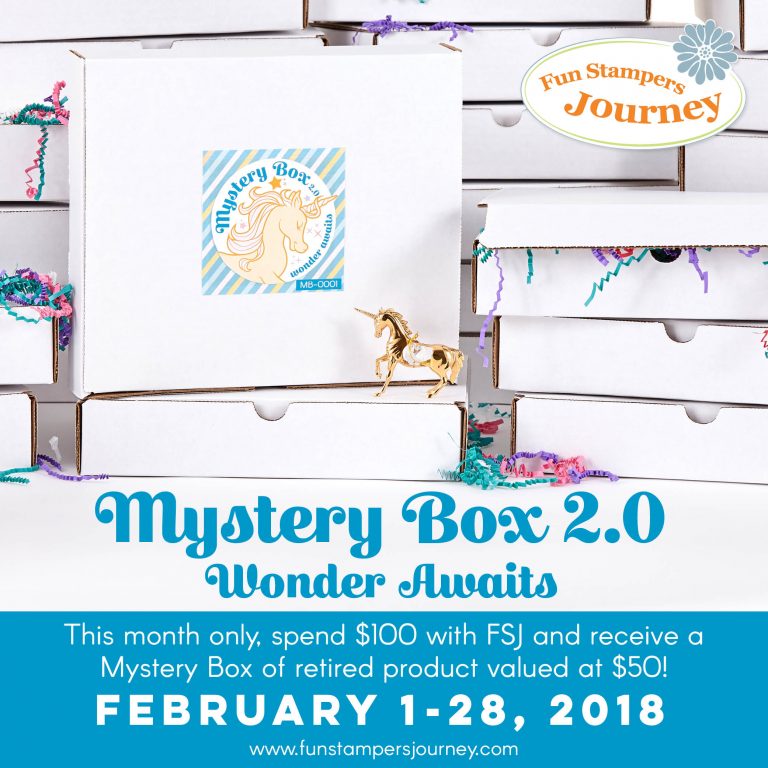
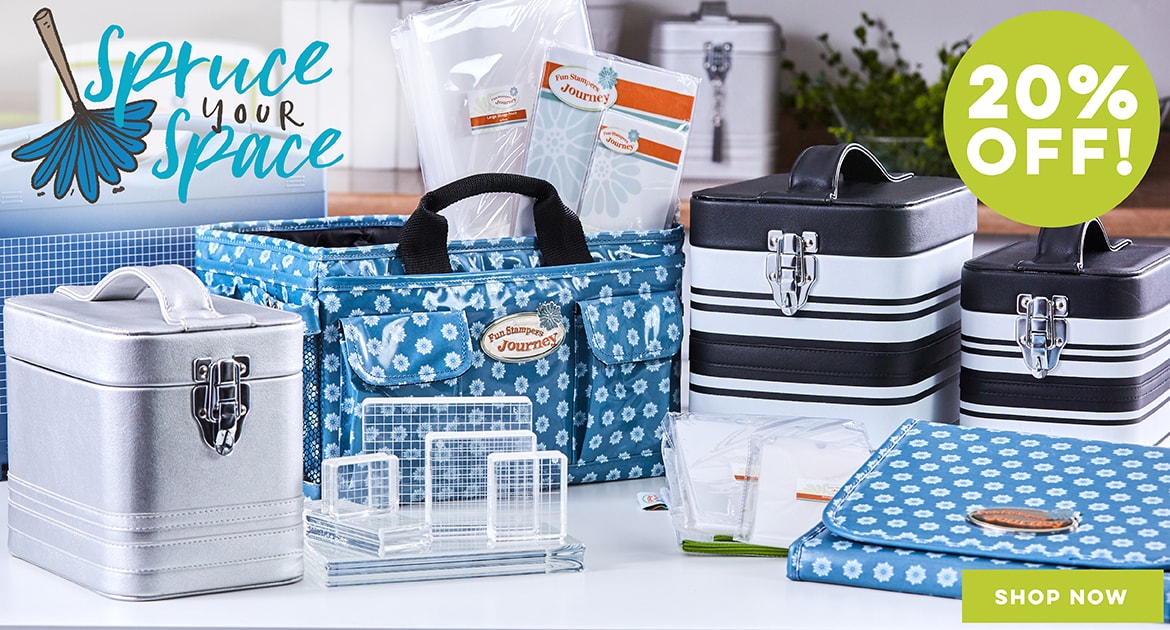
Additionally, I want to share that at Spellbinders and Fun Stampers Journey currently are having a fabulous sale:

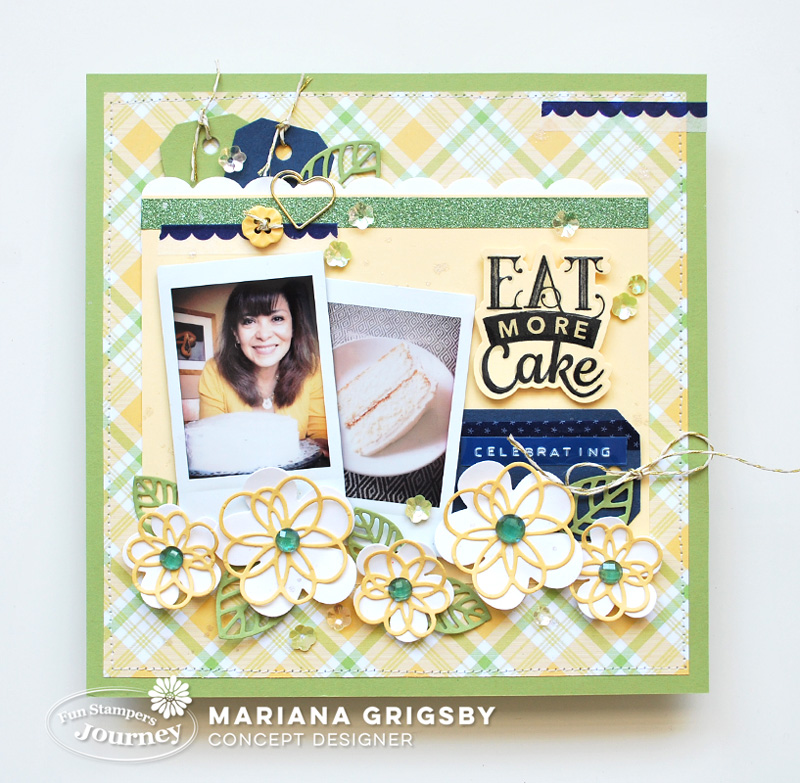
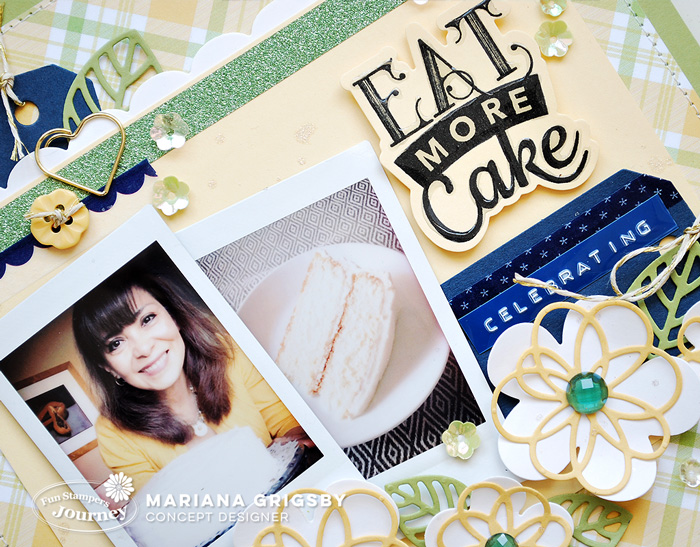
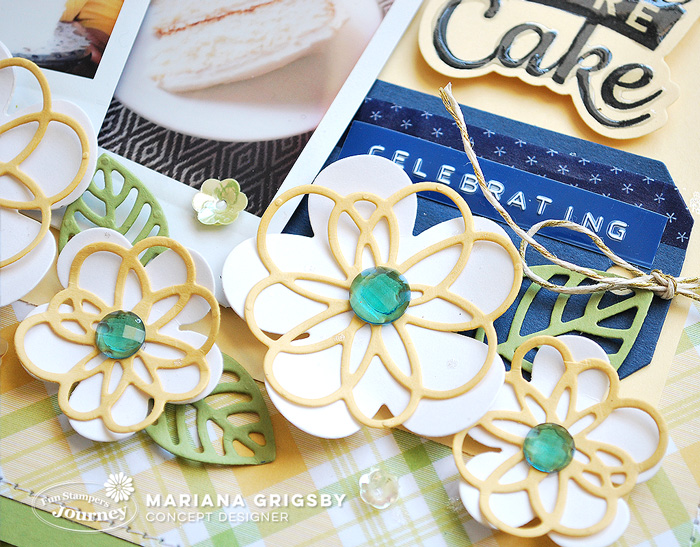
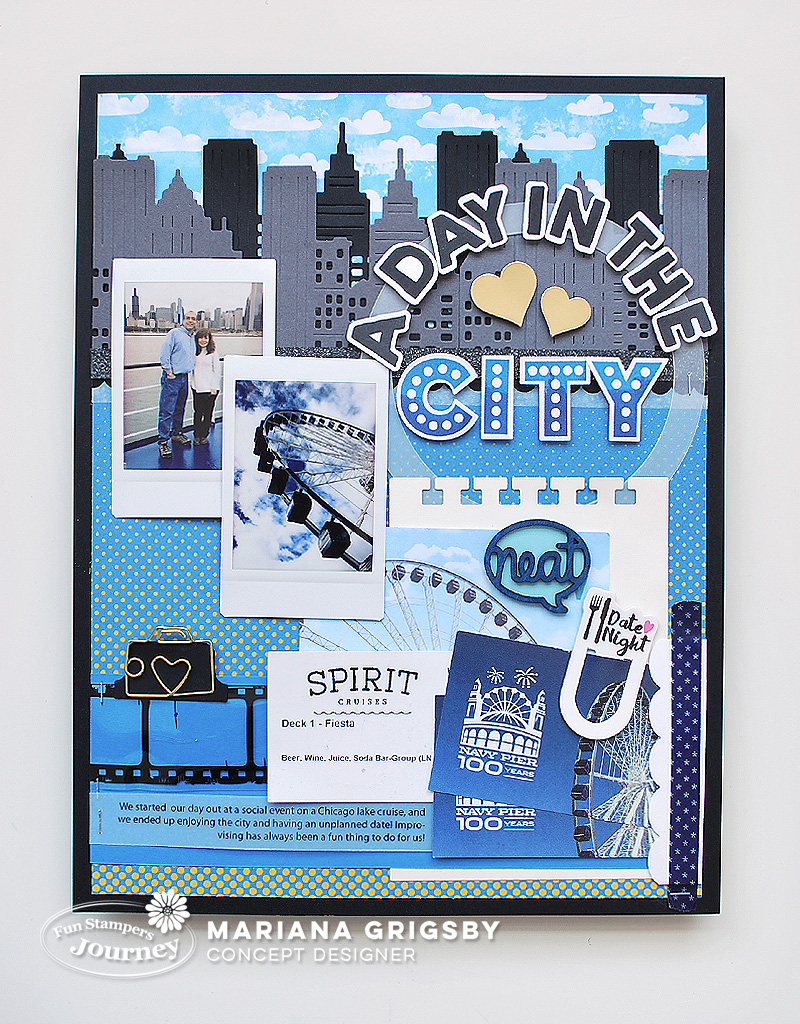
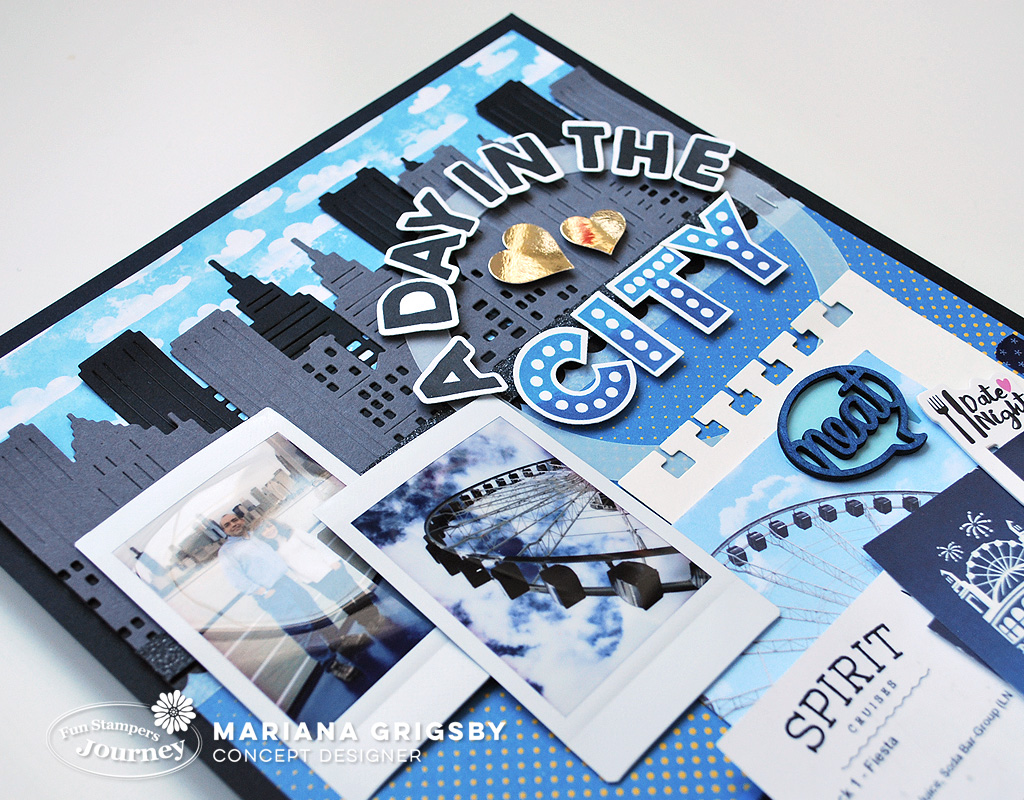
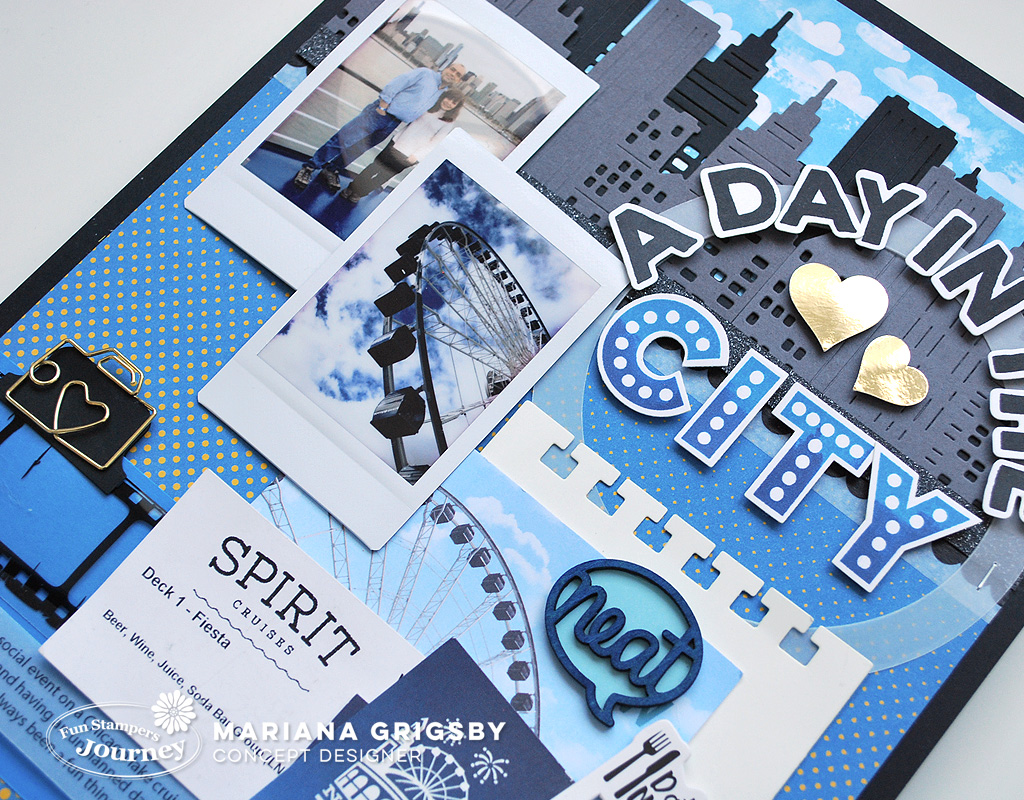
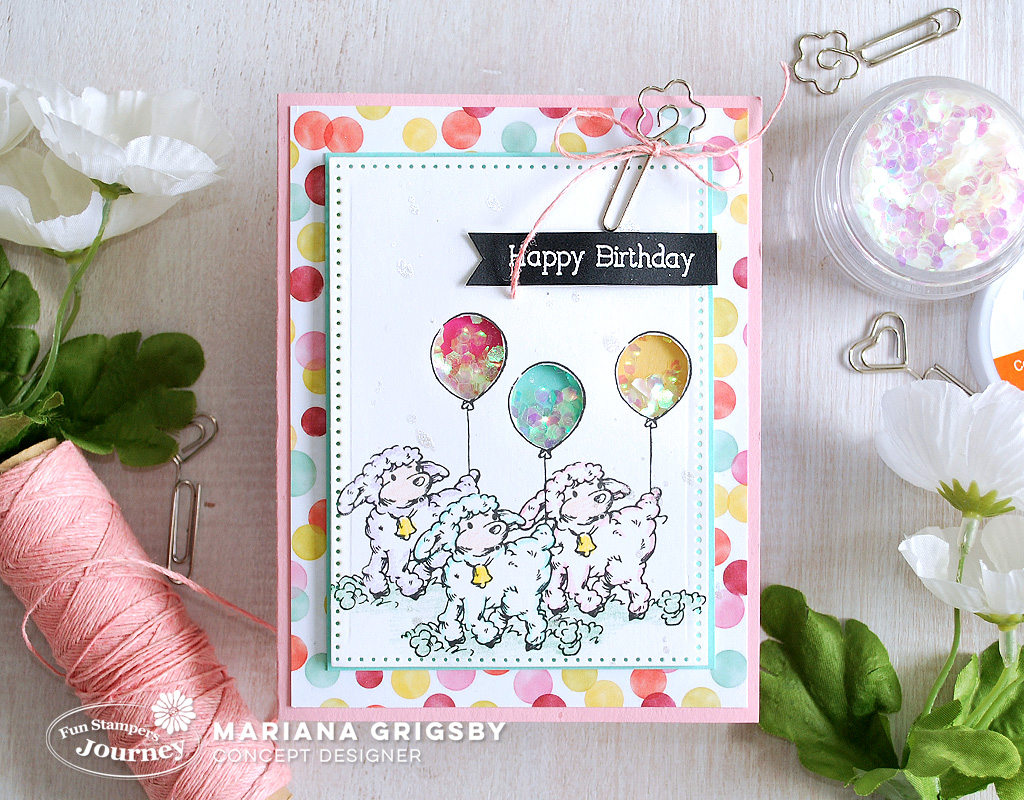
The deals are awesome with lots of fantastic products that you might want to have in your stash, like dies, stamp sets, embellishments and tools. So today I am also sharing some cards that I created in the past with a few of the stamp sets and products on sale:

———- ♥ ———

Be aware that my post includes affiliate links, which means that if you click on and shop through them, I will receive a tiny commission. Thanks!

Well, that’s all from me today. I´ll be back soon to share another project. Thanks for stopping by  Have a wonderful crafty rest of the week!

marianasignat

———- ♥ ———-

FSJ • Congrats Exploding Envelope

Hello, friends! Today I am sharing a fun project that I created inspired by a Fun Stampers Video showing how to make a Exploding Envelope . This is one of those projects that you will enjoy from start to finish. Once you make one, you are going to want to make some more for any occasion; believe me, they are super fun!

Graduation was the theme for my exploding envelope. So using my FSJ Scoring Board I created an envelope from Haystack cardstock. I made a belly band of printed paper (RSVP Prints) and and I added some elements to dress it up: a graduation cap (Hats Off die set) over a circle shape, sequins, decorative tape and a gold star glued over a mini paperclip.

After you slide off the paper band, you open the envelope and there you have five areas that you can decorate according to the theme you have selected.

I used the a printed paper (Through The Year prints) to cover the four flaps of my open envelope and the central rectangle was covered with the same printed paper I used for the paper band. Of course, the central part is the focal point so I layered strips of paper as follows: Vellum, gray cardstock, white cardstock, and a die cut sentiment over a strip of red cardstock (Congrats die set). I adhered these layers together, and I made them work as a pocket to hold a gift card between the printed paper and the layers.

After I adhered those to the envelope face, I added some more elements. A die cut star, a stamped sentiment, a graduation cap, sequins, decorative tape, and another mini paper clip. To finish up my project, I added some stamped details to the upper and bottom flaps of the envelope.

So, if you want a bit more inspiration you can watch the Fun Stampers Video here:

If you would love to see some of the main supplies I used today, please be sure to click on the links below…

FSJ Scoring Board | Hats Off die set | Congrats die set | Circle Around | Star-Dom die set |Through The Year prints | RSVP Prints| Mini Paper Clip Elements

———- ♥ ———

Be aware that my post includes affiliate links, which means that if you click on and shop through them, I will receive a tiny commission. Thanks!

Well, that’s all from me today. I´ll be back soon to share another project. Thanks for stopping by  Have a wonderful crafty week!

marianasignat

———- ♥ ———-

FSJ Stamp of the Month: Natural Dreamer

The new Fun Stampers Journey Stamp of The Month is called Natural Dreamer and it showcases pretty whimsy images that are just perfect to create fabulous projects. So, today I am sharing a card that I created with this set:


I began by stamping a Lace background image over a Watermelon Fusion cardstock panel with Sweet Berry True Color Fusion ink. Then, I adhered the panel over a Sweet Berry folded card.

The focal point was created by Stamping the image over a Whip Cream circle with Sweet Berry True Color Fusion ink. Then, I white-embossed a second image over vellum. After that, I placed the embossed image onto the Sweet Berry image a bit off center to create a shadow effect. With the image on the right place, I made some pencil marks so I could die cut the vellum into a circle slightly bigger than the one below. I adhered the two circles together with a few glue dots (placing them where they were not going to be noticeable).

The rest of the card was simple: a white-embossed sentiment over a Black Licorice strip and matted with a gold strip, Gold Fashion pearls, a heart shaped clip and some silk.

Please remember that for more ideas and inspiration,  be sure to visit the Fun Stampers Journey Blog,  Facebook page,  Instagram and Pinterest.

———- ♥ ———

Well, that’s all from me today. I´ll be back soon to share another project. Thanks for stopping by  Have a wonderful crafty weekend!

marianasignat

———- ♥ ———-

FSJ Easy Breezy Spring + Sneak Peek

Easy Breezy Spring is the name of the new wonderful collection that Fun Stampers Journey will be releasing today April 26th and of course you are invited to join us for a LIVE Launch Party, from 3 to 5pm Pacific Time.

If you are not familiar with the FSJ Parties, I have to say that they are a lot of fun. FSJ will be presenting the whole new collection and along the show they will have project demos, bundles for sale and GIVEAWAYS! You will find the Launch Party on the FSJ YouTube channel, on the FSJ Facebook page , or on the FSJ store.

So, as part of this event, I am sharing a project that I created with one of the sets included in the collection: Cute Boots, take a look…


For my project, I created a simple but fun background using Lovely Blue Liquid Color and Sparkle Silk. I put a some drops of liquid color over the Gel Press and I spread it with a brush, then I picked up the color with a Whip Cream panel. Additionally, I sprinkled some Sparkle Silk over the blue background. Once the panel was completely dried, I adhered it over a Tin Pail folded card. I want to point out that the Sparkle Silk is one of my favorites products because it gives just the perfect sparkle touch that projects need to make them stand out!

Next, I stamped a base image over Whip Cream  cardstock, and I fussy cut it with scissors. After that, I stamped the image again over different colors of cardstock, and using my scissors I cut details of each color, and then I glued them over the base image. The piecing technique is one of my favorites because it will never disappoint you!


To finish up this card, I stamped the sentiment over Whip Creamcardstock and then I die cut it using a cloud shaped die. I adhered the cloud and main image onto the card using foam square. Simple, simple yet very pretty!

Please remember that for more ideas and inspiration,  be sure to visit the Fun Stampers Journey Blog,  Facebook page,  Instagram and Pinterest.

———- ♥ ———

Well, that’s all from me today. I´ll be back soon to share another project. Thanks for stopping by  Have a wonderful crafty weekend!

marianasignat

———- ♥ ———-

Lovely BlueSparkle SilkGel Press

FSJ Stamp of the Month: Fresh Start

April has just begun, so that means a brand new Fun Stampers Journey Stamp of the Month has just been released. This new stamp set is called Fresh Start. I love that this set features a bunch of flower images that are perfect to color using any of your favorite techniques. The sentiments included are also beautiful and just right for Spring.


For this card, I used Liquid Colors (Lemon Drop, Limeade Splash, Orange Creamsicle, and Sweet Pear) to create a fun background over a Whip Cream  Panel. I adhered this panel onto a Lemon Drop folded card. After that, I stamped the images with Black Licorice ink over Whip Cream  cardstock. I used a brush to color the images with Liquid Colors as well, and then I fussy cut the shapes with scissors.

Next, I adhered a piece of polka dot washi tape over a Whip Cream  long strip of cardstock , and I trimmed one of the ends to make it look like a long banner. I also die cut a hollow circle from Lemon Drop cardstock, and I used it as the frame for my bunch of flowers.

Last, I white-embossed a sentiment over Black Licorice cardstock, and I die cut it into a circle and I adhered it onto the card using foam squares. To finish up this card I added some sequins and glitter gems. I loved the color combination I used, so here you have it:

Please remember that for more ideas and inspiration,  be sure to visit the Fun Stampers Journey Blog,  Facebook page,  Instagram and Pinterest.

———- ♥ ———

Well, that’s all from me today. I´ll be back soon to share another project. Thanks for stopping by  Have a wonderful crafty beginning of the month!

marianasignat

———- ♥ ———-

Good Luck Cards + FSJ & SB Online Warehouse Sale

Hello friends! I have a couple of projects to share today. The month of March is literally flying by and I  can’t believe we will be celebrating St. Patricks Day this weekend! Do you celebrate it? Well, we are not Irish, but I think it is fun to pretend we are and wear something green that day, or have the excuse to make a card to give it to a friend or family member, don’t you think?

Anyhow, as I said in the beginning, I created two cards for this Irish day featuring an ATS stamp set called ExtraLucky and the Lucky Clovers Die Set. 
If you have seen some of my projecst before, you should know that I love creating backgrounds with Liquid Colors, so I created one using my JourneyGel Press, Limeade Splash and Sweet Pear Liquid Colors, a brayer along with a Whip Cream cardstock panel. The steps are simple: 1)  Apply liquid colors over the gel press, 2) Spray a bit of water, 3) Spread the colors with the brayer, 4) Pick up the color with the cardstock panel, and 5) Let it dry.

Once the panel was dried,  I adhered it over a Limeade Splash folded card. Next, I stamped the sentiment over it with Black Licorice Ink and I added Journey Glaze over the words (I always love using it to make the sentiments stand out).  I have to say that this product doesn’t take too long to dry, so that is why I like it a lot!

Next, I die cut a clover from Kiwi Slice cardstock. I continued my project by adhering the clover over the card front with foam squares. To finish up this card I used Black Licorice Silk, some green sequins and Lemon Grass thread.

For my second project, I used the Note Pocket Die to create a Sweet Pear cardstock pocket for a small card. After I assembled the pocket, I adorned it with a couple strips of Journey tape and a clover that I die cut from Limeade Splash cardstock. Quick and easy!

Then, I created a folded card from Whip Cream cardstock, and I stamped some Sweet Pear clovers over the card front and a sentiment with Black Licorice ink. As always, I also added Journey Glaze over the words to make the sentiment shine! 


 I flicked some Gold Silk onto the card and I embellished it with some gold sequins. Finally, I tucked the card into the pocket and I added a clip and Lemon Grass thread bow to finish up this card.

Well, today I also want to share that currently Spellbinders and Fun Stamper Journey are having an…

This sale includes lots and lots of products that you can get for $1, $2, $3, $5 or $10 …. Papers, inks, dies, embellishments…. and much more! Believe me, these are HUGE savings so please jump over to the shop and start filling up your cart!

Please remember that for more ideas and inspiration,  be sure to visit the Fun Stampers Journey Blog,  Facebook page,  Instagram and Pinterest.

———- ♥ ———

Well, that’s all from me today. I´ll be back soon to share another project. Thanks for stopping by  Have a wonderful crafty rest of the week!

marianasignat

———- ♥ ———-

Lucky CloversExtra Lucky Liquid Colors Black Licorice Silk

Thinking of You Card

Happy Friday, friends! Here is a card that I created featuring a pretty stamp set called: Strength and Hope along with some others fabulous Fun Stampers Journey products.

I used the Diamond Netting Embossing Folder and Sweet Pear cardstock to make a background panel. I adhered the panel over a folded card of the same color. This is one of my favorites embossing folders, the diamonds pattern is clean and simple, so pretty! I also used the Ornate Blooms ATS stamp and Liquid Colors (Cool Pool, Peaches & Cream, Lemon Grass) to create a stamped panel. This time, it did not really matter if the image was perfect, I knew that just a bit of it was going to be shown so, I think it looks imperfectly perfect for my card. I trimmed the image into a rectangle and I adhered it onto a Cool Pool cardstock mat.

I stamped the butterfly, flower and sentiment using Black Licorice ink over Whip Cream cardstock. I only added Journey Glaze and Sparkle Cuts to them. Next, I die cut the butterfly and flower with their matching die, and I trimmed the sentiment with scissors. After that, I adhered them over a Whip Cream tag that belongs to the Special Day Tags die set. No need for embellishments this time, the card looks so pretty as it is!

I also want to share that currently Fun Stampers Journey has a sale called: Encore-Returning Favorites promoting some fabulous stamp sets, dies and printed papers that were previously retired but now are back at the store. Be aware that these products will be available while supplies last. Please be sure to click >>>HERE<<< to see the complete list of products, you might want to get some of them!

Please remember that for more ideas and inspiration,  be sure to visit the Fun Stampers Journey Blog,  Facebook page,  Instagram and Pinterest.

———- ♥ ———

Well, that’s all from me today. I´ll be back soon to share another project. Thanks for stopping by  Have a wonderful crafty weekend!

marianasignat

———- ♥ ———-

Diamond Netting •Special Day Tagss •Ornate BloomsStrength

FSJ • Eat More Cake

I have been trying not to get too far behind making my scrapbooking pages. I have opted for smaller page sizes, and also using my mini printer for the pictures. I have a regular photo printer but I have found that using my small printer saves me time and I think the prints look really good in smaller layouts.

One of the things that I like to do every year on my birthday is to bake my own cake. Last September, I made a white cake,  and a few weeks ago , I made an 8″ x 8″ scrapbook page to record it. I had the good intention of submitting this layout for a publication but right after I finished it,  I saw that the due date had past 😥 Anyway, I thought the least I could do was to share it with you 😉

EatMoreCake2

For this layout I used products from the Bloom This Way and the Fun Stampers Journey Inspiration Catalogs. The stamp set that I used for the title is called Celebrations Script, and I also used its matching die set.  To complement the title I simply added the “celebrating” word using an old fashion labeler.

EatMoreCake3

The design has a few layers of cardstock that work as a main frame for the pictures and title.  I added a row of layered flowers and leaves right  below the pictures and I embellished them with Rainbow Drops and Bloom Time sequins.

EatMoreCake4

I also created a cluster of tags, sequins, a heart clip and a button directly above one of the pictures. Once all the elements were in place, I  flicked some Sparkle silk over the whole page.

EatMoreCake5

I like mixing and matching products when I am creating. Generally my pictures and patterned papers will give me a good start to choose all the colors and little details that at the end will make the pages shine  😉

Here is the color combo that I used for this page:

MG_combo33

By the way, this is the current FSJ Promotion of the month: 25% off select accessories, dies, tools, and more. Please click on the image below for more information about it:

overtherainbow_1170x630

———- ♥ ———

Well, that’s all from me today. I´ll be back soon to share another project.

Thanks for stopping by 🙂 Have a wonderful week!

marianasignat

———- ♥ ———-

supplies

Celebration Script stamp set / SS-0540
Celebration Script die set / DI-0397
Blooming Details / DI-0327
Borders Basics / DI-0144
Tag Set / SR-0014
Black Licorice True Color Fusion Ink / IP-0041
Sparkle Silk / IP-0126
Journey Sequins Bloom Time /AC-0114
Rainbow Drops / AC-0178
Journey Gold Thread / AC-0205
Denim Prints Tape / AC-0313
Fresh Limeade Tape / AC-0311
I Heart Clips / AC-0261
Journey Color Buttons II / AC-0098
Spring Filled Prints / PP-0051
Lemon Grass 8.5 x 11″ cardstock / CS-0019
Pineapple Smoothie 8.5 x 11″ cardstock / CS-0026
Whip Cream 8.5 x 11″ cardstock / CS-0040
Denim Days 8.5 x 11″ cardstock / CS-

FSJ • A Day in the City

The 12″ x 12″ scrapbook page size has always been my favorite to work with since the large size gives you plenty of room for pictures and many products like patterned papers and embellishments. However, I also have done some of my pages in 8″ x 8″ or 6″ x 8″ sizes. These last two, are fun since you can finish a page faster, but the size of the page kind of limits the amount of details and pictures you can use. Anyhow, I was curious about trying another size for a page: 8.5″ x 11″ or Letter size. I have seen many  scrapbookers creating using this size and they always seem to achieve beautiful pages where the amount of elements seems to be just right.

Well, today I am sharing a letter size page that I made using wonderful Fun Stampers Journey products to document a short visit to the city that my husband and I did last year. I won’t be describing each of the steps I followed to create this page but I will highlight a few of them.

020418web_adayinthecity8

I used the clouds paper that is included in the Spring Filled Prints pack, as the background for the double layer of buildings I made with the Hero City die. For the other part of the page, I used the dotted paper included in the Birthday Pop Prints pack. To disguise the joint in between, and to connect the upper and bottom parts of the page, I used two lines of Journey Tape. You can barely see them since the pictures and title are right on top of them.

020418web_adayinthecity5

For the word “city” I aligned the letters on an acrylic block leaving enough space in between them, so I could die cut them later. I inked the whole letters with Beach Ball ink and then, using a sponge dauber and Huckleberry Fusion Ink, I applied color over half of each letter to achieve an ombré effect. This part has to be done fast because you don’t want the ink to dry over the stamp. For this step be sure that both of your ink pads are quite juicy.

020418web_adayinthecity6

For the words “A Day in The”, I stamped each letter with Black Licorice Ink and I die cut each of them with their matching die. I used a circle as a base to adhere the letters. Using a circle was in part, because we rode the Ferris wheel 😉 and because I could put more letters along the circle than if I tried to put them all in a straight line over the word “city”. I think they fit and look better. Besides that, I punched a couple of hearts using Mirror Gold cardstock, just to embellish and link both lines of the title.

020418web_adayinthecity7

Besides the pictures, I also used the memorabilia from that day as part of my page. Since the page already had a lot of elements so far, I did not want to add that many embellishments, so I only used a bubble text, a piece of view film, and a camera clip. Overall I can say that I liked the letter size for a page, I made it quite fast, and I loved how my page turned out at the end.

The promotion of February at Fun Stampers Journey is called: Mystery Box, and you can find out more about it and how you can get one by clicking >>>HERE<<<!

Mystery-Box-Social-Shares-50-768x768.jpg

———- ♥ ———

Well, that´s all from me today. I´ll be back soon to share another project.

Thanks for stopping by 🙂 Have a wonderful week!

marianasignat

———- ♥ ———-

supplies

Solid Bet Stamp set /SS-0489
Marquee Type stamp set / SS-0171
Hero City die set/ DI-0398
Outline Bet die set / DI-0350
Marquee Type die set/ DI-0104
Journey Circles die set / DI-0039
Notebook Page die set / DI-0268
Border Basics die set / DI-0144
Circle / SR-0001
A5 Page Creator / SR-0037
Beach Ball True Color Fusion Ink / IP-0047
Huckleberry Fusion True Color Fusion Ink / IP-0035
Black Licorice True Color Fusion Ink / IP-0041
Beach Ball Silk/ IP-0145
Love Clips / AC-0347
Hello Word Bubble / AC-0230
Remember Me clips / AC-0321
Clear View Film / AC-
Denim Print Journey Tape / AC-0313
Classic Elegance Journey Tape / AC-0291
Sweet Romance Journey Tape / AC-0290
Love is / TO-0006
Spring Filled Prints / PP-0051
Birthday Pop Prints pack / PP-0052
Journey Vellum / PP-0044
Beach Ball 8.5” x 11” cardstock / CS-0088
Black Licorice 8.5” x 11” cardstock / CS-0003
Butter Cream 8.5” x 11” cardstock / CS-0006
Whip Cream 8.5” x 11” cardstock / CS-0040
Rock Candy 8.5” x 11” cardstock / CS-0031
MIrror Gold / CS-0136

FSJ • Happy Birthday Card

Since the Bloom This Way mini catalog was released, I have been having a a lot of fun creating with some of the great products included in it. If you are curious about this fabulous catalog, please click >>>HERE<<< so you can see it!

Today I am sharing a fun card using one of my favorites sets from this catalog: Story Book Occasions.  So, I chose the little lamb image and I stamped it three times with Black Licorice Ink over a Whip Cream cardstock  panel. To achieve the overlapped images I made a mask with a sticky note.

011018web_lHappyBday

Then, I die cut the panel into a pierced rectangle. I also gave the images a hint of color  with my Color Burst pencils and using a craft knife I cut out the balloons centers to create three mini shaker windows.  I used a little bit of Clear Sparkle Confetti to fill in the tiny windows. I matted the panel with Cool Pool cardstock.

011018web_lHappyBday2

After that, I layered a Spring Filled Print rectangle over a Bubble Gum card base, and adhered the shaker panel on top of it.  Last, I finished up the card with a sentiment, Sparkle silk, Bubble Gum Thread and a Fun Day Elements paper clip.

Please don’t forget that this month’s promotion is still going on:

spruce

For more details about this promotion please click  >>>HERE<<<

———- ♥ ———


Well, that´s all from me today. I´ll be back soon to share another project.

Thanks for stopping by 🙂 Have a wonderful crafty week!

marianasignat


———- ♥ ———-