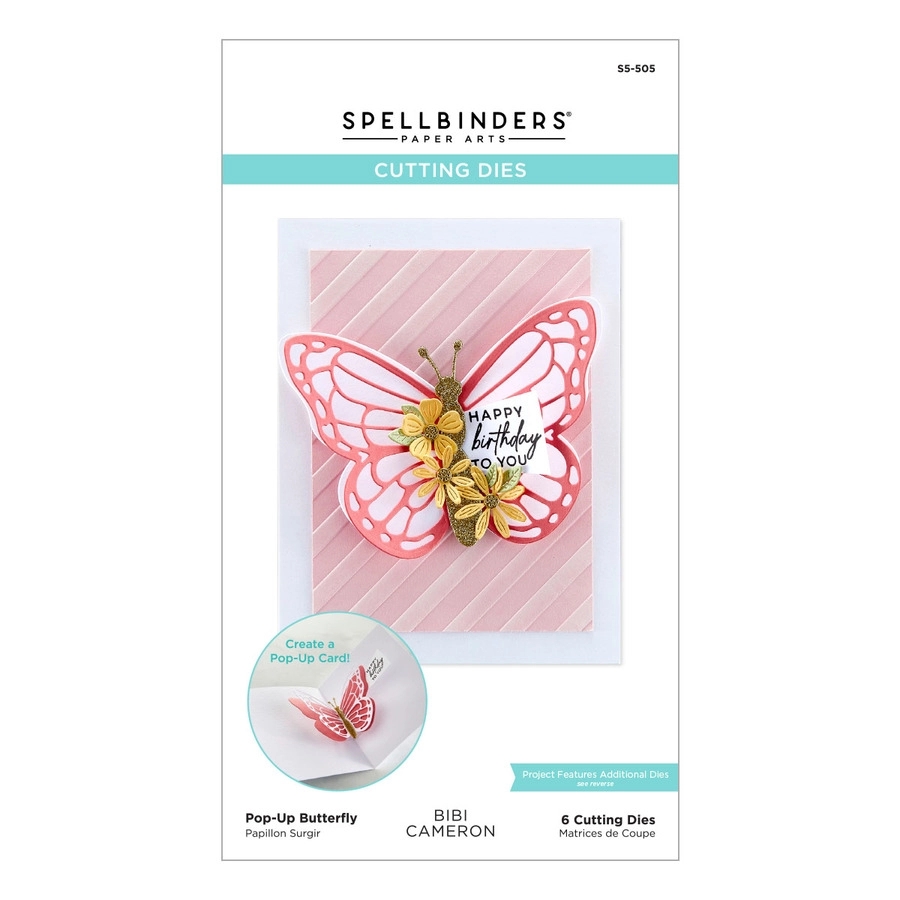
Hello! Quick post today just to share a card that I created using a pretty Spellbinders die set that features a large butterfly. I always have liked to use butterflies as the focal point for cards. They are so much fun!
Without Change…
Be aware that my post includes affiliate links, which means that if you click on and shop through them, I will receive a tiny commission at no cost for you. Thanks!
This die set in particular is fun because it helps assemble and create an interactive butterfly. You can make the butterfly pop-up when you open the card or you can simply use it as a regular die.
The butterfly of my card has three layers. The first one was die cut from white card stock and then I applied color using a sponge dauber and a couple of ink colors. I also sprinkled some sparkle silk over it. The second layer was die cut from black cardstock and adhered to the colored layer with craft glue. The third layer is the body of the butterfly and it was die cut from brushed silver cardstock.
The backgrounds of this card is very simple. I used a sponge dauber and ink directly from the ink pad to create it. I like that you can see a bit of the cardstock texture on the card. A sentiment and a few silver sequins were the final touches for this card. Below you can watch a video of how I did a similar background using liquid colors.
I want to point out that the Spellbinders store has different choices of butterflies stamps and dies to choose from, so please don’t forget to visit the SB store. This is the current sale…
Well, that’s all from me today. I´ll be back soon to share another project. Thanks for stopping by, have a wonderful rest of the week!
Hi! I am back today just to share another card that I made using almost the same supplies of my previous card. Once again, the highlight of this card is the background that I created using the Ranger Stamping Foam. For this card, I used a few different colors of Distress Oxide Inks and after I applied them over the foam, I spritzed a bit of water over it… the unpredictable results always amaze me!
Thank You
Be aware that my post includes affiliate links, which means that if you click on and shop through them, I will receive a tiny commission at no cost for you. Thanks!
To color the pretty butterfly I used my Copic markers and to give the image a bit of a shine I used my Wink of Stella Pen. I know is hard to see in the picture, but it looks really pretty in real life😉.
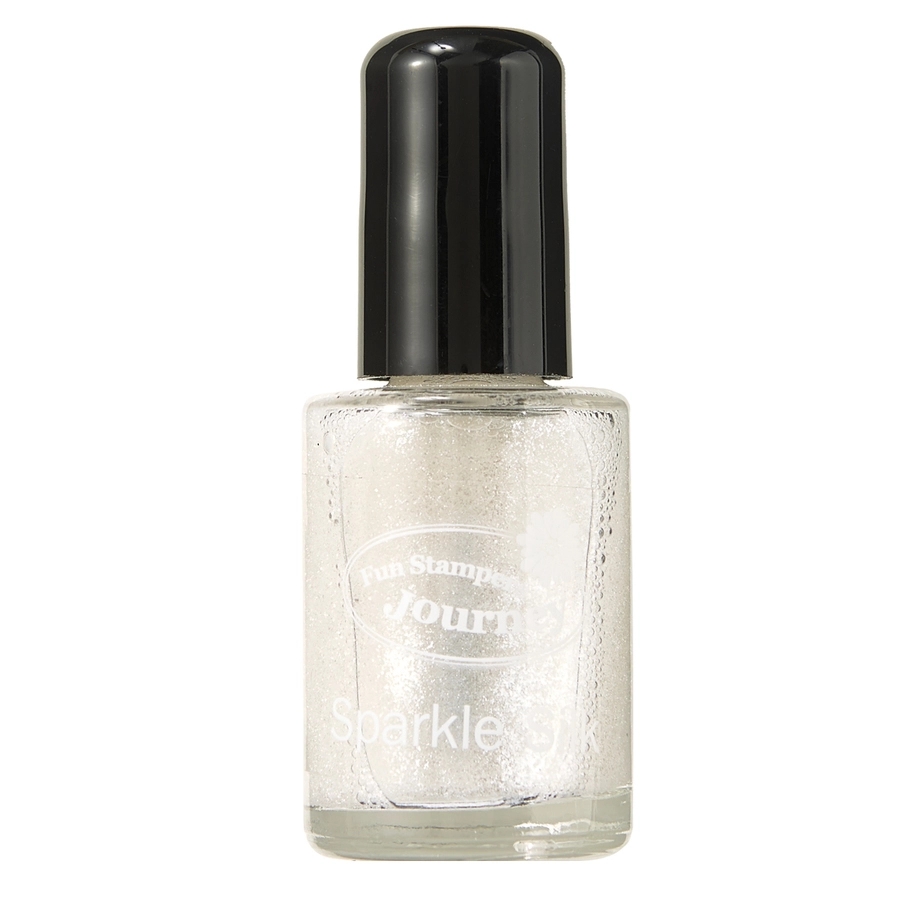
Another product that I love to use instead of gemstones is the Nuvo Glitter Drops White Blizzard. With this product you can simply put some drops here and there and then just wait a bit until it dries. The results are always fantastc!
Hello! Time flies when you are busy. It has been a while since my last post, but I finally had the chance to sit for a little bit to post a card that I made a few weeks ago using some great products that you can find at the Spellbinder store. The highlight of this card is the background that I created using something really new for me, the Ranger Stamping Foam.
With the Ranger Stamping Foam, you can create unique backgrounds using different things like die cuts, stamps or any other object with dimension or texture that can be embossed on the foam. The process is simple, you only need a heat craft tool, a stamping foam and some objects that can create an embossed image. For this technique, you can experiment using different type of inks, colors, etc. The sky is the limit!
A Note of Thanks
Be aware that my post includes affiliate links, which means that if you click on and shop through them, I will receive a tiny commission at no cost for you. Thanks!
To create the background you start by heating the foam with a heat craft tool for about 15-30 seconds. Then, you press the foam onto a textured surface for about 15 seconds ( You can previously arrange dies, stamps or other objects over a flat surface). After that, you can ink it up and use it as a stamp. What I love the most about this foam is that you can re-use it. You just re-heat it and the texture will disappear; this awesome foam, will be ready to use again.
Please be sure to watch this fun Spellbinders video where the process is visually explained: https://youtu.be/wpxh3d5SZYs
Hello! I have another card that features a beautiful Spellbinders die set perfect for Christmas. I am adding the main products below the card pictures 🙂
Rejoice
Be aware that my post includes affiliate links, which means that if you click on and shop through them, I will receive a tiny commission at no cost for you. Thanks!
Hello! Quick post today just to share a card featuring a wonderful Spellbinder products: a die set, a glimmer hot foil plate and patterned paper. I am just adding the main featured products below the card pictures 🙂
Season’s Greetings
Be aware that my post includes affiliate links, which means that if you click on and shop through them, I will receive a tiny commission at no cost for you. Thanks!
Hey there! Just a quick post to share a couple of Halloween cards that I made a couple days ago. I used one of my favorite die sets for both cards and this time I am just adding the main featured products below the card pictures 🙂
Happy Halloween
Be aware that my post includes affiliate links, which means that if you click on and shop through them, I will receive a tiny commission at no cost for you. Thanks!
Hey there! Today I have a couple cards that I want to share with you. Both of these cards feature some of the recent Spellbinders additions to the Glimmer Hot Foil Plates section and the Thin Metal Etched Dies section, that you might want to get and have in your stash. As always, product details are shared underneath the pictures…
Where The Flowers Bloom
Be aware that my post includes affiliate links, which means that if you click on and shop through them, I will receive a tiny commission at no cost for you. Thanks!
Emboss a white cardstock panel with Sun Rays embossing folder. Adhere to card front.
Apply Moondust Hot Foil to a piece of white cardstock to create circle frame. Die cut with Rings Around the Circle die. Adhere to card front with foam squares.
Die cut the swan, swan details, flowers, leaves and crown from different colors of cardstock. Arrange the shapes and adhere them to card using adhesive, and foam squares.
Apply Silver Hot Foil to a black cardstock strip to create sentiment. Adhere to card front with foam squares.
Embellish card with gems.
Featured Products:
Please be sure to visit the Spellbinders store to check out the current promotion they have…
Well, that’s all from me today. I´ll be back soon to share another project. Thanks for stopping by, have a wonderful crafty day!
Today, I am very happy to be participating in the Hero Arts Catalog Blog Hop. Hero as we all know, always brings us amazing new products that will keep us inspired and creative. Please click >>>HERE<<< so you can see the whole catalog and start making your wishlist.
Be aware that my post includes affiliate links, which means that if you click on and shop through them, I will receive a tiny commission from Hero Arts at no cost for you. Thanks!
For this card, I used Happy Thanks Stamp & Cut XL along with the Hexagons Infinity dies, take a look: The design of this card is quite simple, and I only played with different colors and sizes of hexagons to create a background for the main sentiment. I die cut the word “thanks” from white cardstock and black foam. I like to do this to add dimension to the word and avoid having a bunch of little pieces of foam tape behind the words. I placed the white slightly off center over the black to make it look like a drop shadow. The sentiment was simply white-embossed over black cardstock and I embellished the card with some colorful sequins.
For this card I used Envelope Accessories Fancy Dies and Sending Love Mail stamp set. I have to say that I love that little envelope. It is the perfect size to put some flowers in it…or hearts, or whatever you wish. Of course, the flower and leaf dies were super fun to color with Chameleon Markers. The background was created with Distress ink and a sponge dauber. Then I stamped the words block included in the stamp set. I finished up this card with a white-embossed sentiment, decorative tape, Sparkle silk and some sequins.
The third card was a mix of products. I used the Happy Thanks Stamp & Cut XL to die cut the word “happy” from white cardstock and then, I gave it color with two ddifferent colors of Distress Inks. I also die cut the word from black foam to add dimension, just like card #1. I created a bouquet of flowers using the dies from the Envelope Accessories Fancy Dies. I Colored the shapes with watercolors. For the background, just like card #2, I used the Sending Love Mail stamp set and Distress inks. I sprinkled a bit of water to create the water marks over the DI background and I also stamped the words block over it. I complemented the card with a strip of vellum, decorative tape and some crystal blue and green dots.
Hero will give away one $50 gift card, drawn from the comments left across the hop. Enter by Wednesday, February 24th at 11:59pm pacific, and the winner will be announced on the Hero Arts blog the following week.
The new My Monthly Hero kit has just been released and it will be available as of TODAY December 7th at the Hero Arts store, but be aware that this kit is available for a limited time only – once it’s gone, it’s gone. Please remember that you have the option to subscribeand receive the kit monthly and never miss one. Pre-order your kit today – we estimate the kit will begin to ship on Friday, December the 11th and continues throughout the following week.
Be aware that my post includes affiliate links, which means that if you click on and shop through them, I will receive a tiny commission from Hero Arts at no cost for you. Thanks!
The fabulous MMH of December features a wonderful Heroscape sky scene and other great products that will keep you entertained creating fabulous cards, check it out:
MMH December
The Kit includes: 6″ x 8″ Clear Stamp Set, Hope Word Fancy Die, Cloud Fancy Die, Cloud Window Die, 4 reactive Cubes (Early Dawn, Morning Mist, Chartreuse, Thistle), Yellow Prisma Embossing Powder 0.5 oz. Kit Value: $78.00 Kit Cost: $34.99
Please don’t forget that every month Hero also releases a bunch of fabulous Ad-On products, which are also available for purchase and they are themed with relation to the current MMH.
So, for today I made three cards. All of them were created using the images and Fancy Dies from the MMH of December…
My first card, showcases the Hope Fancy Die along with the Window and Cloud Fancy Dies. I die cut the window and two clouds from white cardstock to create a frame/base for the focal point. The focal point is the Hope Fancy Die which I die cut from white cardstock as well. I achieved the ombré effect by coloring the word with Chameleon markers.
To add extra dimension to the word, I die cut two more words and I used them as layers. Next, I flicked a bit of Sparkle Silk over the base card and then I adhered the window, clouds and word to the card. I finished it up with some clear drops.
The second card features some of the stamps also included in the kit, take a look:
I began by creating the clouds background. The kit comes with three layers of clouds but I only used two of them. I stamped them with soft ink colors followed by the larger sun rays, sentiment and flying birds image. To achieve perfectly stamped images, I used my Misti Regular Hero Black which is one of the tools that I highly recommend to invest on if you are getting into the stamping hobby.
As the final touches for this card I added some Glaze details along with some Sparkle Cuts and Sparkle Dust.
The third card is a bonus card, because I wasn’t planning to make it, but the Hope Fancy Die is so pretty that I couldn’t resist making another card with it. This time I paired the word with an embossing folder that I have in my stash, and I though it was just perfect for the die:
For this card I used white cardstock to die cut the word, and I only added a foam circle underneath the “O” center to add a bit of dimension. The “H” and “E” edges were merely adhered to the embossed panel with craft glue. The complete panel was adhered to the white base card with foam tape.
I added a few clear drops as the final touches and voila! Simple yet so pretty.
Hero will give away one $50 gift card, drawn from the comments left across the hop. Enter by Sunday, December 13th at 11:59pm pacific, and the winner will be announced on the Hero Arts blog the following week.
Please be sure to visit all the participants blogs in order to increase your chances of winning:
December celebrations are around the corner so it is time to start sending our Holiday cards to friends and family. Today I would like to share two of the cards that I made, using Spellbinders and FSJ products. I will only mention tips or tricks and the list the products of these cards below the pictures, since I believe the process of making these cards is simple.
Be aware that my post includes affiliate links, which means that if you click on and shop through them, I will receive a tiny commission at no cost for you. Thanks!
Tip 1: Use black or white foam to die cut the larger shapes to add dimension. Tip 2: Use embossing folders to add texture to part of the background, that helps to enhance the focal point.
Tip 3: Make more than one sentiment when you are using your Glimmer Hot Foil Machine, which is always fun to use. You can have sentiments ready to use for more projects!