New Wonder & Joy Project Kit by FSJ

Oh yes! We already have to start our winter projects and for that I am happy to share that the NEW Joy & Wonder Project Kit by Fun Stampers Journey is now available at the shop, take a look:

Joy & Wonder Project Kit

This kit comes with an assortment of  ONE Embossing Folder, TWO die sets, TWO Stamp Sets, and a card making project kit to make FOUR cards. Also included are full color instructions and an online Video Tutorial. You will be guided through every step of the way as your create die cut projects:

Be aware that my post includes affiliate links, which means that if you click on and shop through them, I will receive a tiny commission at no cost to you. Thanks!

I chose one of the sets included in this kit create two different cards. This stamp set is called Arctic Wonder and I also used its matching die set. So the first card features three of the bear images over a striped background made of cardstock strips.

This is an easy way to create a colorful background for your cards that will make your stamped images stand out. The sentiment was simply white-embossed over a Black Licorice stitched circle, and of course some sequins made the trick to embellish this cute card.

Supplies Card #1: Joy & Wonder Project Kit | FSJ 8.5″ x 11″ Cardstock | FSJ True Color Fusion Inks | Splash Zone Sequins|

The second card showcases the other three bear images included in the set. With that many bear images you have a lot of choices to create the perfect arctic scene, don’t you think? I stamped the images over Whip Cream cardstock with Black Licorice ink, and I arranged them over a Whip Cream panel. After that, using my Misti I stamped the sentiment and I enhanced it with Journey Glaze.

This time, I used a Holiday Cheer Prints rectangle as the background/mat for my card. I used front and back of the same sheet. The snowflakes pattern for the largest panel and I used the other side of the paper to create a strip, which also serves as the base for my bears, so they don’t look like they are floating 😉

I finished off this card with a silver snow flake, some silver-embossed tiny snowflakes and some silver sequins.

Supplies Card #2: Joy & Wonder Project Kit | Snow Blooms Die Set | FSJ 8.5″ x 11″ Cardstock | FSJ True Color Fusion Inks | Holiday Cheer Prints|Special Celebration Sequins

Please be sure to check out all the awesome deals and offers available at the Spellbinders store, like the one below:

———- ♥ ———

Well, that’s all from me today. I´ll be back soon to share another project. Thanks for stopping by,  have a wonderful crafty rest of the week!

marianasignat

———- ♥ ———

New Happy Place Collection By FSJ

Just in time to switch gears to Summer, the new Happy Place Collection by Fun Stampers Journey will be released in the Spellbinders shop on July 10th. But, there is a fun Project Kit already available for purchase, which includes stamps and dies perfect to create some pretty awesome cards.

Happy Place Project Kit

Be aware that my post includes affiliate links, which means that if you click on and shop through them, I will receive a tiny commission. Thanks!

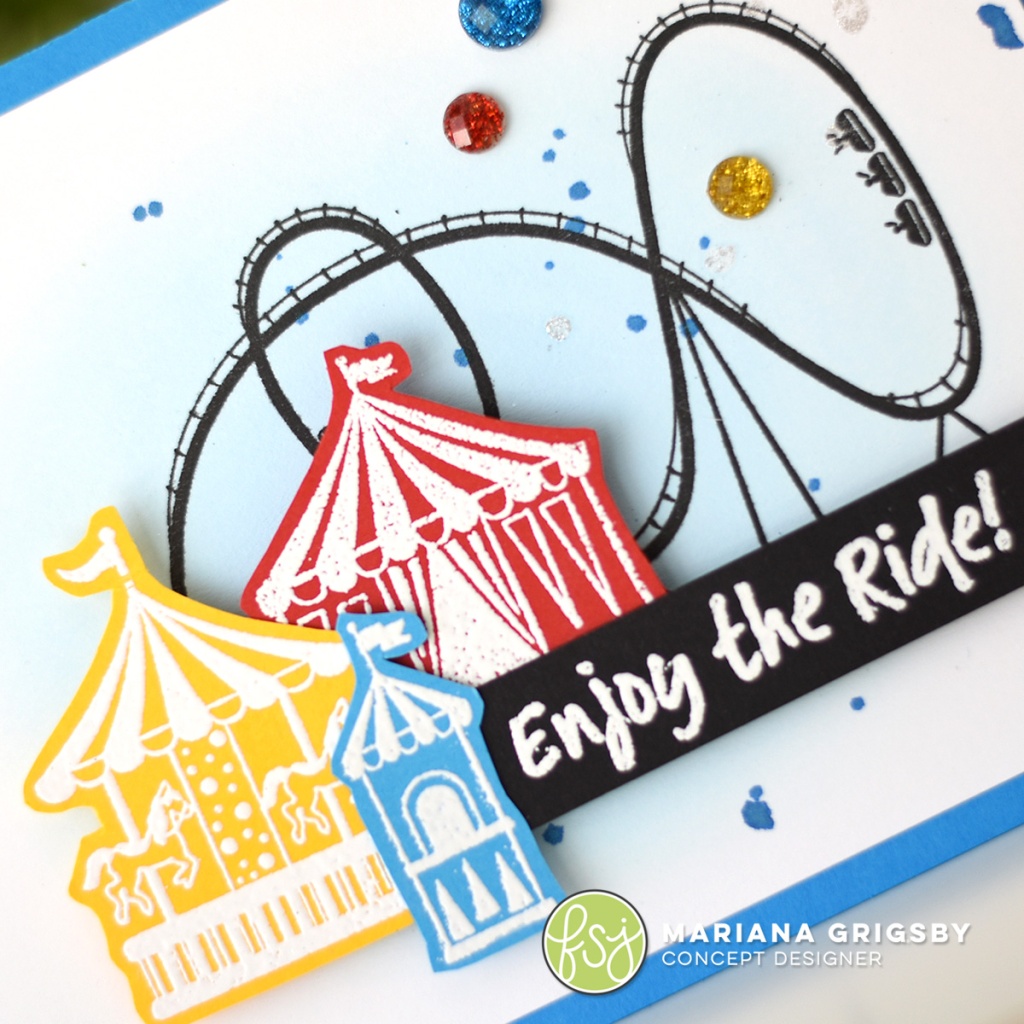
So, using the Enjoy the Ride stamp set (included in the kit), I created a card…

Lately, one of my favorite things to do is to create subtle backgrounds using Liquid Colors and a sponge dauber (you can see a quick video >>>HERE<<< This is an easy great way to keep your creations simple, and let the stamped images shine! After that, I stamped the rollercoaster image onto the background with Black Licorice Ink and I used silks to leave some fun splashes of color!

Then, I white-embossed some images over different colors of cardstock and arranged them over the background. Last, but not least I embellished the card with some gemstones.

Supplies: Happy Place Project Kit | Lovely Liquid Color | Sparkle Silk | Beach Ball Silk | Summer Play Sparkles Adhesive Gems

Please be sure to check out all the awesome deals and offers available at the Spellbinders store.

Clearance - Page 1 - Spellbinders

———- ♥ ———

Well, that’s all from me today. I´ll be back soon to share another project. Thanks for stopping by,  have a wonderful crafty rest of the weekend!

marianasignat

———- ♥ ———

FSJ • Happy Travels Card

Hello there! Quick post today sharing a card featuring a Fun Stampers Journey stamp set called Hit the Road. This set can be used to create cards as well as scrapbooking projects…

I used the main image along with a sentiment for this card. The vintage truck image is perfect to color and in this case, I stamped it onto River Stone Carstock with Black Licorice ink. Then, I colored it with my Journey Color Burst color pencils, using the Whip Cream color pencil at the end to add some details that give the truck a bit of dimension (according to me 🙂 )

Be aware that my post includes affiliate links, which means that if you click on and shop through them, I will receive a tiny commission. Thanks!

Next, I created the Whip Cream panel using the Gilded Nested Rectangle die sThen, I created the Whip Cream panel using the Gilded Nested Rectangle die set, which basically are rectangles with beveled corners… they look really really nice! So, I simply stamped the route map image with River Stone ink over the rectangle. After that, I adhered the panel and truck over a Rock Candy folded card, and I included a strip of Black Licorice Sparkle washi tape that I affixed with a few staples. I finished up this card with some sequins and a white-embossed sentiment over a Black Licorice strip.

Hit the Road Stamp Set

Starry Night Sequins

Black Licorice Sparkle Washi Tape

Gilded Nested Rectangle Die Set | River Stone True Color Fusion Ink | Black Licorice True Color Fusion Ink | Clear Pigment Ink | Journey White Embossing Powder | River Stone Cardstock |Rock Candy Cardstock | Whip Cream Cardstock| Black Licorice Cardstock

———- ♥ ———

Well, that’s all from me today. I´ll be back soon to share another project. Thanks for stopping by,  have a wonderful crafty rest of the week!

marianasignat

———- ♥ ———

FSJ Stamp of the Month is here: Sentiment Stacks

Hello March, and hello the new FSJ Stamp of the Month: Sentiment Stacks! I have always thought that you can never have too many sentiment stamp sets in your stash, so let me tell you that, Sentiments Stacks can be a great addition to your stamp collection. The stamp set comes with six larger stamps that can be complemented with smaller words to create a perfect mix and match sentiments!

So this time I created two cards, showcasing some of the sentiments included in the set. Here is my card #1:

To create this card I white-embossed the “birthday’ sentiment over Huckleberry Fusion cardstock strip, and I complemented with the words “oops, I missed your” on top of it. I also used a frog from the Stick Around stamp, which I stamped over a piece of printed paper and die cut with its matching die.

The background was created with a small dauber dowel, clear pigment ink and whip cream embossing powder. I included a Whip Cream circle shape and a Citrus Cooler border to complement the focal point. I embellished the card with some Rainbow drops and on the inside of the card I stamped the word “sorry”.

Card #1 Supplies: Sentiment Stacks | Stick Around Stamp Set | Stick Around Die Set |Circle Around Die Set | Borders Essentials Die Set | Playful Prints | Rainbow Drops Gems Embellishments |

Here is card #2:

For my second card, I white embossed the large word “sorry” over a Black Licorice cardstock strip, and I complemented it with the words “for your loss”. I also used one of the butterflies from the stamp set Small Things; I stamped it twice with black Licorice ink over Whip Cream cardstock, and then I die cut it with its matching die. I gave them a hint of color by tapping a few times a Watermelon Fusion ink pad, directly over the stamped butterflies.

I created a crisscross background with the edge of Black Licorice and Whip Cream ink pads over a Grape Fusion Panel. I also added some Whip Cream silk details to it. Finally, I arranged all the elements over the card, and I finished it up with sequins and rhinestones.

Card #2 Supplies: FSJ Stamp of the Month |Small Things Stamp Set | Small Things Die Set | Whip Cream True Color Fusion Ink Pad | Clear Pigment Ink Pad | Black Licorice True Color Fusion Ink | Sunrise Mix Sequins | Journey Glaze |

Be sure to find a lot more wonderful inspiration and details about the MARCH SOTM over the Spellbinders-FSJ blog, and a great video for you to WATCH.

Remember that for more ideas and inspiration, visit the Spellbinders Blog,  Facebook page,  Instagram and Pinterest.

———- ♥ ———

Be aware that my post includes affiliate links, which means that if you click on and shop through them, I will receive a tiny commission. Thanks!

Well, that’s all from me today. I´ll be back soon to share another project. Thanks for stopping by  Have a wonderful crafty week!

marianasignat

———- ♥ ———-

You Are One in a Chameleon Card

Happy Friday! I have a Hero Arts card today that features a pretty Stamp & Cut set called Chameleon. This type of sets are fabulous because they make things easier for you. You get the stamps and matching dies in the same package at a great price. So, take a look of the card I created:

For this card, the images were simply colored with Chameleon Markers (how clever, right?) and then they were die cut with their matching dies. I arranged them over a circle shape and I of course I also white-embossed sentiment onto a black small circle to complement the focal point.

To make the background I used a a green panel that I previously created with FSJ liquid colors. Then, I stamped the Jungle Bold Prints background over it with Lime to Forever Green Ombré Ink Pad. This kind of pads are one of my favorite products from Hero Arts, just because they make your stamping more interesting and fun! I matted the panel with a darker green panel and adhered it over a folded card. After that, I placed the main elements over the card, I embellished it with some Sunset Hero Hues Enamel Dots, Journey Glaze and Journey Sparkle Cuts details.

———- ♥ ———-

Be aware that my post includes affiliate links, which means that if you click on and shop through them, I will receive a tiny commission. Thanks!

Well, that’s all from me today. I´ll be back soon to share another project. Thanks for stopping by â€¢  I hope you all have a wonderful crafty weekend!

marianasignat

———- ♥ ———-

DC265 Chameleon Stamp & Cut | CG778 Jungle Bold Prints | Intense Black Ink |CH328 Sunset Hero Hues Enamel Dots |AF320 Lime to Forever Green Ombré Ink Pad |Journey Glaze | Journey Sparkle Cuts

_ _ _ _ _ _ _ _ _ _ _ _ _ _ _ _ _ _ _ _ _ _ _ _ _ _ _ _ _ _ _ _ _ _ _ _ _ _ _ _ _

Toucan Do It Card


Hello, hello! Quick post today just to share a shaker card that I created using a fun and pretty Spellbinders die set called Shapeabilities Botanical House Etched Dies, take a look:

This image has an empty alt attribute; its file name is 020720web_toucandoit-1.jpg

I don’t often create shaker cards, but I have to say that they are fun to make. In this case the house frame and the leaves were placed above the acetate. I affixed them between the frame and the acetate and then, the confetti was placed underneath the acetate so it could move freely.

This image has an empty alt attribute; its file name is 020720web_toucandoit2-1.jpg

I thought that pretty house was missing some visitors, so I used a couple of toucan and flower stickers to create a fun scene. I also stamped a sentiment from a FSJ stamp set called Toucan Do It. If you like this set, please be sure to visit the SB store and see all the new stuff that they have i

———- ♥ ———-

Be aware that my post includes affiliate links, which means that if you click on and shop through them, I will receive a tiny commission. Thanks!

Well, that’s all from me today. I´ll be back soon to share another project. Thanks for stopping by â€¢  I hope you all have a wonderful crafty rest of the week!

marianasignat

———- ♥ ———-

This image has an empty alt attribute; its file name is supplies1.jpg

Shapeabilities Botanical House Etched Dies | Toucan Friends Chipboard Stickers |Toucan Do It Stamp Set | Confetti Sparkle Elements – Lemon Grass |

HA• Thank You Card

Hello there! Quick post today, just to share a thank you card that I created using a cute stamp set by Hero Arts: Teacup Flowers. I love the flower images that remind me about how fun and pretty Spring is!

Well, one thing that I liked a lot about this particular set is that it includes a variety of different blooms, leaves, and other floral details that are perfect to create bouquets. For my card, I stamped the images with Intense Black ink and then, I colored them with markers, with very little details… They are just very pretty by themselves! Then, I die cut them with their matching frame cuts.

I arranged them over a white panel using glue dots and foam tape to add dimension. After that, I white embossed a simple sentiment over a strip of black cardstock. Finally, I adhered the panel over a folded card, and I added some clear dots as the final touches. Simple, colorful and fun.

———- ♥ ———-

Be aware that my post includes affiliate links, which means that if you click on and shop through them, I will receive a tiny commission. Thanks!

Well, that’s all from me today. I´ll be back soon to share another project. Thanks for stopping by â€¢  I hope you all have a wonderful crafty week!

marianasignat

———- ♥ ———-

Teacup Flowers Stamp Set | Teacup Flowers Frame Cuts |Intense Black Ink

FSJ • Stamp of the Month: Penguin Waddle

Hey there! I am beginning this month with a card featuring the Stamp of the Month by Fun Stampers Journey: Penguin Waddle. This cute set includes a bunch of adorable penguins and various sentiments which are great to create winter cards 😉 Take a look:

I began by creating the background using a Catalina Splash Cardstock panel, and I simply rubbed Whip Cream PanPastel over the panel in a circular motion from the center towards the edges to create an ombré effect. Then, I simply matted the panel with Watermelon Fusion Cardstock and adhered the panel over a Pool Play Cardstock folded card. I flicked some Sparkle Silk over the background too.

I die cut the hill from Whip Cream cardstock and adhered it onto the card. Then, I stamped the penguins with Black Licorice True Color Fusion Ink, I colored their feet and beaks with a color pencil, and stamped those cute hats. This set doesn’t have a matching die set, but they are super easy to fussy-cut with your detail scissors. Finally, I white embossed a sentiment and die cut it into a heart shape. I adhered penguins and heart with foam squares and embellish with Fashion Silver pearls, a piece of Silver Sparkle Washi Tape and a Petal Clip.

Be sure to find a lot more wonderful inspiration and details about the November SOTM over the Spellbinders-FSJ blog, and a great video for you to WATCH.

Remember that for more ideas and inspiration, visit the Spellbinders Blog,  Facebook page,  Instagram and Pinterest.

———- ♥ ———

Be aware that my post includes affiliate links, which means that if you click on and shop through them, I will receive a tiny commission. Thanks!

Well, that’s all from me today. I´ll be back soon to share another project. Thanks for stopping by  Have a wonderful crafty week!

marianasignat

———- ♥ ———-

Penguin Waddle |Spring Build-A-Scene | Heart Felt Die Set | Black Licorice True Color Fusion Ink|Journey Color Burst color pencils | Party Pop PanPastels Palette|Whip Cream cardstock | Catalina Splash Cardstock | Pool Play Cardstock | Watermelon Fusion Cardstock | Silver Sparkle Washi Tape |Fashion Silver | Journey Glaze | Sparkle Silk | Petal Clips | 

The New FSJ Holiday Cheer Collection is here!

Oh, Yes! Fun Stampers Journey has just released their new Holiday Cheer Collection, and it it amazing!

The Holidays Season is not far from now, and obviously we all like having new products to begin creating for those important months to come. So today I am sharing two products that I created using two of my favorite stamp sets from the Holiday Cheer release.

My first card features a very cute set called Yeti Confetti. This is a fun set that includes images that you can use all along the Winter season. So, here you have it:

To create the background I used Lovely Blue Liquid Color along with shaving cream. I made a mix with those and transferred a bit of the the mix over an acrylic block, just enough to make a rectangular mark. Then I placed the block over a Whip Cream panel, removed the excess and let it dry.

To complement the background, I white-embossed some snowflakes, as well as a sentiment over a Black Licorice cardstock strip. The cute Yeti images were colored with Liquid Colors and I added some Journey Glaze details to them. Last but not least, I embellished the card with Fashion Silver pearls, Gift twine and a button (Holiday Mix and Match Embellishment pack).

The second card features one ATS stamp called Fall Thanks and it includes a big solid sentiment along with some small Fall related images. Take a look:

To create the background I used the same technique as the one from my first card, but this time using two different liquid colors. Quick and easy. So, for the beautiful sentiment I used one of the Create-a-Palette pads to create my own combo of Liquid Colors, and I used it to ink the large sentiment.

I really like these pads and the beautiful ombré effects that you can achieve with your own color combinations, so much fun!. So, I die cut the sentiment with its matching die, I added Journey Glaze and Sparkle Cuts and I let the piece dry. Meanwhile I die cut a rectangular frame from Whip Cream cardstock using the Fancy Edged Rectangles die set by Spellbinders.

I adhered this frame over the background panel, and then I adhered the sentiment with Journey squares. I finished up this card with some Sparkle Silk (a must have FSJ product!) and some Fashion Silver pearls.

I highly recommend you to to see the >>>new Holiday Cheer catalog <<< There are a lot of new stamps and lots of inspiration for you. If you missed the launch show, you can watch it by clicking >>> HERE <<< there were Guest designers, amazing card designs and a lot of fun.

Remember that for more ideas and inspiration, visit the Fun Stampers Journey Blog,  Facebook page,  Instagram and Pinterest.

———- ♥ ———

Be aware that my post includes affiliate links, which means that if you click on and shop through them, I will receive a tiny commission. Thanks!

Well, that’s all from me today. I´ll be back soon to share another project. Thanks for stopping by  Have a wonderful crafty weekend!

marianasignat

———- ♥ ———-

Yeti Confetti | Fall Thanks | Fall Thanks die set | Lovely Blue Liquid Color | Banana Cream Liquid Color | Peaches and Cream Liquid Color | Fashion Silver | Journey Glaze| Sparkle Cuts | Create a Palette | Sparkle Silk | Fancy Edged Rectangles |

My Monthly Hero Blog Hop + Giveaway

As always, the beginning of the month means that a new My Monthly Hero kit is being released. This fantastic kit will be available TODAY August 5th at the Hero Arts store, but be aware that this kit is available for a limited time only – once it’s gone, it’s gone. This month the kits will begin shipping from Hero Arts on Friday, August 9th. I want to point out that you have the option to subscribe and receive the kit monthly and never miss one.

Anyway, as you can see below, this time the theme for the kit brings up the medieval times and its magic…. kings, queens, castles, dragons, princesses, you name it!

The kit contains the following: 6″ x 8″ Clear Stamp Set, 17 Coordinating Frame Cuts, 1 Fancy Castle Die, 2 5.5″ x 8.5″ sheets of Mirri Matte Lava Purple Paper, 2 5.5 x 8.5″ sheets of Parchment Paper, 3 Glimmer Ink Pots (Gold, Purple, Red), Dragon Scale Sequins. The value of this kit is $83.49, but you only have to pay $34.99 for it… so this is really a good deal!

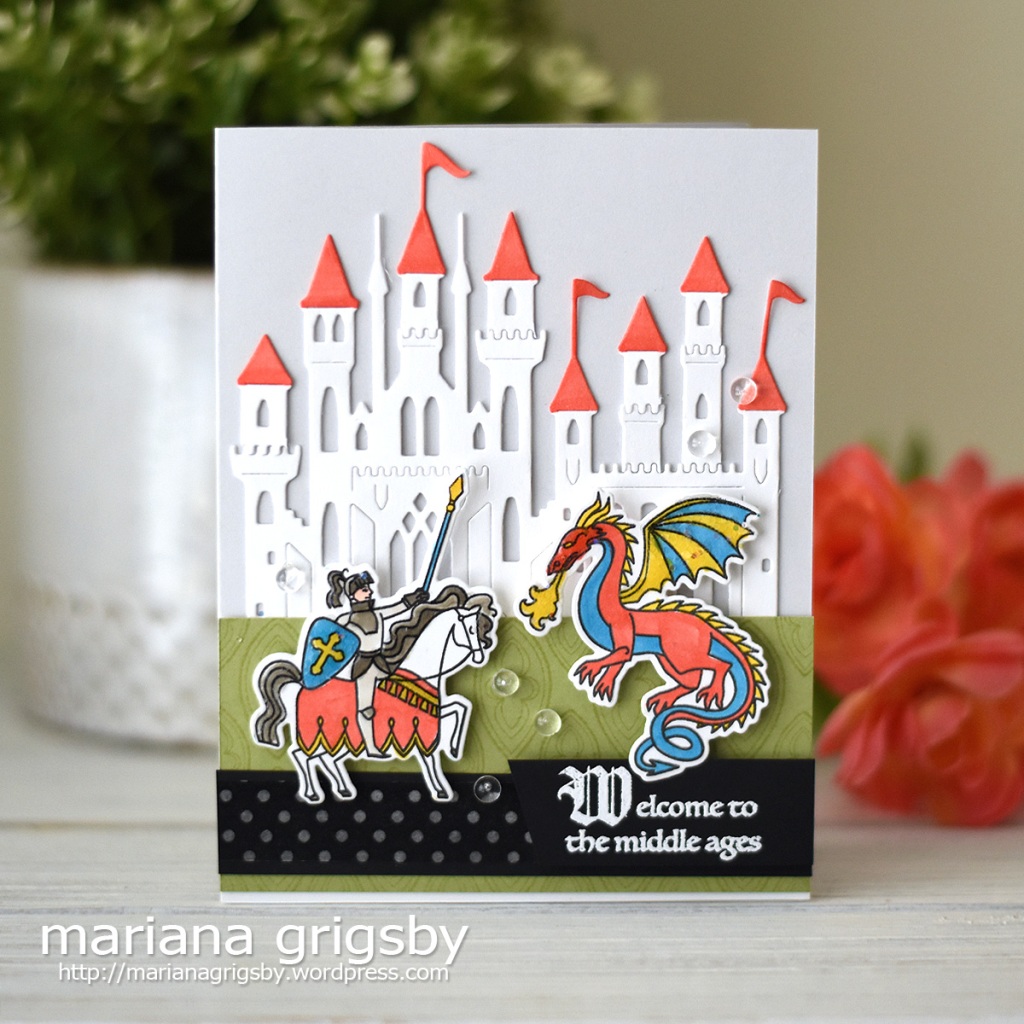
So, I created two cards for today’s release, and for my first card I used the stamp and die sets from the main kit along with the Trefoil Bold Print cling background stamp and the Paper Layering Castle (add-ons products).

I began by die cutting the Paper Layering Castle die from white cardstock, and I colored the tips of the towers with a red marker. I adhered the castle over a light gray folded card. Then, I stamped the Trefoil Bold Print cling background stamp with green ink over a green cardstock rectangle to create the lower part of the card, just to give a little of detail to the panel.

After that, I used the main stamp and die sets to create the focal images which are the knight, the dragon and a sentiment . The knight and dragon were simply stamped with black ink over white cardstock and then colored with markers. The sentiment was white-embossed over a piece of black cardstock and as the final touches, I used clear dots, glaze details and decorative tape.

Here is my second card:

For this one, I created the background using two different liquid colors and a sponge dauber to create long strokes over a white cardstock panel. Blue for the sky, green for the grass. After that, I used the As You Wish stamp set and its coordinating frame-cuts to create a fairy-tale scene. Of course a castle image had to be included too! I stamped the castle from Build a Castle stamp set and die cut it with its matching frame-cuts. Then, I colored the images with markers, arranged them over the background and adhered them with foam tape. After that, using a stamp positioner tool, I stamped a sentiment directly over the background with black ink.

As I normally do, I added glaze details and some clear dots to finish up this card. I think is easy to get pretty cards when you have great products in your hands!

Here I am sharing the pictures of the add-ons products that I used to create the cards, so you can see more details of them. Please be sure to see the complete collection by clicking >>>HERE<<<.

As part of this blog hop, Hero Arts is giving away one kit as a prize to one blog reader – selected from the comments across all of the blogs in the hop. The giveaway closes Sunday, August 11 th at 11:59pm, and the winner will be announced the following week on the Hero Arts blog.

Please be sure to visit all the participants blogs in order to increase your chances of winning:

The Hero Arts Blog
Amy Kolling
Caly Person
Daniel West
Debi Adams
Ilina Crouse
Janette Kausen
Jessica Frost-Ballas
Julee Tilman
Libby Hickson
Lydia Fiedler
You are here >>> Mariana Grigsby <<< You are here
Michelle Short
Yana Smakula

———- ♥ ———

Be aware that my post includes affiliate links, which means that if you click on and shop through them, I will receive a tiny commission from Hero Arts. Thanks!

Well, that’s all from me today. I´ll be back soon to share another project. Thanks for stopping by  🙂 Have a wonderful crafty week!

marianasignat

———- ♥ ———-

Hero Arts: MMH August | Trefoil Bold Prints | Build A Castle | Build A Castle Frame Cuts | As You Wish | As You Wish Frame Cuts | Paper Layering Castle | Intense Black Ink | White Embossing Powder |

Others: Whip Cream Cardstock | Tin Pail Cardstock | Lemon Grass Cardstock | Lemon Grass Ink | Lovely Blue Liquid Color | Limeade Splash Liquid Color | Journey Glaze | Journey Sparkle Cuts |

FSJ Stamp of the Month: Book Worm

Fun Stampers Journey begins this month with a new release of a great Stamp of the Month set: Book Worm. School days are about to begin so I think this set is quite perfect for that. It includes twelve pretty stamps and there is a matching die set also available for purchase.

For this release I created two cards, here is the first one:

I used one of the print papers from the Through the Years Prints collection as the background. Then I print the books images with Black Licorice Ink over a Whip Cream card-stock rectangle. I adhered this piece over the card. stamped the two books and cup image with Black Licorice ink, I colored it with Journey Color Splash Colors, and I die cut that it with its matching die.

I also white embossed the sentiment over a Black Licorice cardstock rectangle, and then I arranged everything together over the card. I used a piece of vellum paper as a mat for the black rectangle. I finished it up with some dots, a apple shape paper clip and some green pencils (sticky notes) which I think are just perfect as embellishments for my card.

For my second card I used the back of the same paper print I used for the first card as the background. I adhered this panel over a folded card and i also attached a piece of vellum paper with staples over the print.

This time I stamped the book image with Black Licorice ink over three different colors of card-stock matching the colors of the paper print. I fussy cut the three images with scissors and I white-embossed a sentiment over a Black Licorice rectangle.

I arranged everything over the card and I embellished it with dots, hearts an decorative tape. Simple yet fun.

Anyway, you will find a lot of wonderful inspiration and more details about the August SOTM over the Spellbinders-FSJ blog, and a great video for you to WATCH.

Remember that for more ideas and inspiration, visit the Fun Stampers Journey Blog,  Facebook page,  Instagram and Pinterest.

———- ♥ ———

Be aware that my post includes affiliate links, which means that if you click on and shop through them, I will receive a tiny commission. Thanks!

Well, that’s all from me today. I´ll be back soon to share another project. Thanks for stopping by  Have a wonderful crafty weekend!

marianasignat

———- ♥ ———-

Book Worm| Black Licorice True Color Fusion Ink| Clear Pigment Ink|Sweet Pear Cardstock|Black Licorice Cardstock|Fresh Forest Cardtock| Whip Cream Cardstock | Pool Play Cardstock | Catalina Splash Cardstock | Journey Vellum | Through the Years Prints| Journey Color Splash Watercolor Pencils| Rainbow Pencils |Summer Play Sparkles | Rainbow Hearts | Party Burst Dots | Cool Tunes Paper Clips Elements |