This year we are neither having a parade, fireworks nor a big celebration, but what we have is the opportunity to celebrate united with our hearts and be proud to be Americans. I have been a US citizen for more than five years now, and I am very proud of that and of living in this amazing country. So, I just wanted to wish you a very Happy 4th of July with this card:
Some of my friends/co-workers retired this year so, since retirement cards are some of those that I dont make very often, I made some to send to them by mail. Without really paying attention if I was using current or discontinued products, I chose some Spellbinders products that I have in my stash to create my cards….
Be aware that my post includes affiliate links, which means that if you click on and shop through them, I will receive a tiny commission. Thanks!
I also used another discontinued die set called Happy Expressions and I complemented the word “happy with the word “retirement” which I printed out with my handy dandy printer over Whip Cream cardstock. I created four cards total, same design, different colors…
Just in time to switch gears to Summer, the new Happy Place Collection by Fun Stampers Journey will be released in the Spellbinders shop on July 10th. But, there is a fun Project Kit already available for purchase, which includes stamps and dies perfect to create some pretty awesome cards.
Be aware that my post includes affiliate links, which means that if you click on and shop through them, I will receive a tiny commission. Thanks!
So, using the Enjoy the Ride stamp set (included in the kit), I created a card…
Lately, one of my favorite things to do is to create subtle backgrounds using Liquid Colors and a sponge dauber (you can see a quick video >>>HERE<<< This is an easy great way to keep your creations simple, and let the stamped images shine! After that, I stamped the rollercoaster image onto the background with Black Licorice Ink and I used silks to leave some fun splashes of color!
Then, I white-embossed some images over different colors of cardstock and arranged them over the background. Last, but not least I embellished the card with some gemstones.
Hello, hello! Quick post today just to share a card that I created for today, featuring an ATS stamp set called Born to Grill by Fun Stampers Journey.
This is a small set that currently is on sale and obviously you can use it for Father’s Day or other occasions. No special recipe for this card, just Black Licorice and Whip Cream inks over different colors of cardstock. Quick and easy.
Be aware that my post includes affiliate links, which means that if you click on and shop through them, I will receive a tiny commission. Thanks!
Here is the color combination that I created using FSJ cardstock colors:
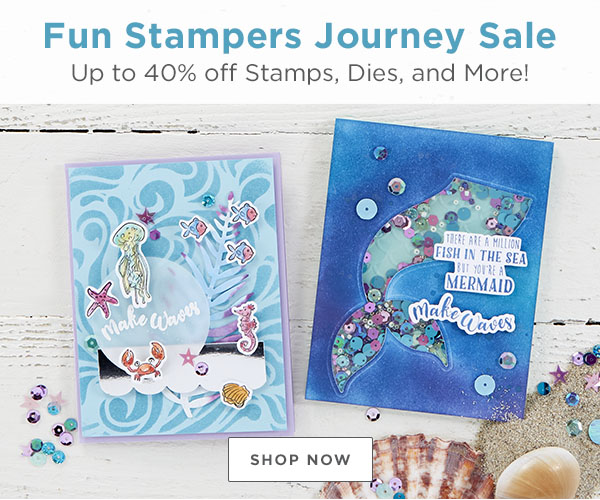
Please don’t forget to click on the image below, this sale is ending soon:
Anyway, I hope you all can celebrate today your husband or father or both. I know this year might not be the right one to have a big gathering, but as far a we can celebrate them in certain way it will make this day special.
———- ♥ ———
Well, that’s all from me today. I´ll be back soon to share another project. Thanks for stopping by, have a wonderful crafty rest of the weekend!
Today happy to share two great Fun Stampers Journey deals that are available at the SB store right now. I am talking about the Hello Delivered and Love Delivered gift kits which are the perfect bundles to create a fun “little something” to give to someone. Both bundles include boxes, tags, ribbons and some great embellishments. This is the Hello Delivered Gift Kit:
Bundle contains: Set of 10 to go boxes 16 pre-printed tags (just need to be cut out), Package of Jumbo Clothespins, Roll of Black Gingham ribbon, Set of colorful buttons, Cool Tune Elements and Beach Breeze ThreadRoll of Lemon Drop ribbon.
Be aware that my post includes affiliate links, which means that if you click on and shop through them, I will receive a tiny commission. Thanks!
I made a few projects using my tags and boxes but I also made a card that coordinates with the gift box. The tags can be also used to create the focal point of cards if you want to, it is up to you!
These food grade takeout boxes ( 5″ x 4″ x 2 1/2″) in coated kraft-colored chipboard are just perfect to fill with some yummy goodies.
I want to point out that the tags coordinate perfectly with the Bread Tag Die but if you don’t have that die you can also cut them out with scissors.
The other Gift Kit is called Love Delivered, take a look:
Bundle contains: Set of 10 takeout boxes 16 pre-printed tags (that just need to be cut out), Package of Jumbo Clothespins, Roll of Sweet Berry Gingham ribbon, Set of colorful buttons, Fun Day Paperclip Elements, Golden Tansy Twine and a Roll of Limeade Splash ribbon.
I created a similar set of card and gift box for the Love Delivered Gift Kit…
It is a lot of fun to use your printed paper to coordinate with your card and tags. What can you put inside the boxes? Well, how about some candy, some cookies, popcorn or anything your heart desires 🙂
The boxes are Food grade “Chinese” takeout boxes measuring 4″ x 3 1/2″ x 4″ in coated kraft-colored chipboard. Ready to fill, ready to decorate!
Hello there! Quick post today sharing a card featuring a Fun Stampers Journey stamp set called Hit the Road. This set can be used to create cards as well as scrapbooking projects…
I used the main image along with a sentiment for this card. The vintage truck image is perfect to color and in this case, I stamped it onto River Stone Carstock with Black Licorice ink. Then, I colored it with my Journey Color Burst color pencils, using the Whip Cream color pencil at the end to add some details that give the truck a bit of dimension (according to me 🙂 )
Be aware that my post includes affiliate links, which means that if you click on and shop through them, I will receive a tiny commission. Thanks!
Next, I created the Whip Cream panel using the Gilded Nested Rectangle die sThen, I created the Whip Cream panel using the Gilded Nested Rectangle die set, which basically are rectangles with beveled corners… they look really really nice! So, I simply stamped the route map image with River Stone ink over the rectangle. After that, I adhered the panel and truck over a Rock Candy folded card, and I included a strip of Black Licorice Sparkle washi tape that I affixed with a few staples. I finished up this card with some sequins and a white-embossed sentiment over a Black Licorice strip.
The new My Monthly Hero kit has just been released and it will be available as of TODAY June 8th at the Hero Arts store, but be aware that this kit is available for a limited time only – once it’s gone, it’s gone. Please remember that you have the option to subscribe and receive the kit monthly and never miss one.
As you know, every state in this country is taking steps to get back to normal at their own pace, so I am sharing a Hero statement that I would like to share with you:
“We are working on restarting our operations in a safe manner, bringing back our production and shipping teams with social distancing, and keeping our warehouse cleaned under the strictest standards. We are first focusing on all of the orders in-house for all of our wonderful and patient customers, subscribers, and international customers, and hope to get back to regular shipping times once we are through what was delayed. We estimate June kits and add-ons will begin shipping on Friday, June 19, after all previous orders have gone out.”
Now, going back to the fabulous MMH of June, this one features a 4 x 6″ stamp set and a 6″x6″ cling stamp along with dies and other great products perfect to create amazing projects for Summer, take a look:
The kit includes: 4″ x 6″ Clear Stamp Set, 6″ x 6″ Northern Lights Cling Stamp, 3 Fancy Scene Dies, 10 Coordinating Frame Cuts, 2 5.5″ x 8.5″ Sheets of Black Handmade Watercolor Paper, Glow In The Dark Lacquer Pen, Shiny Silver Stars. The value of this kit is $74, but it can be yours for only $34.99… so this is really a good deal!
This month, there also some wonderful Add-On products, and with some of those, I created two cards that I am sharing with you today. My first card features Color Layering Howling Wolf Stamp set, Color Layering Howling Wolf Frame Cuts and two Fancy Dies from the main kit. I want to point out that the HA Color Layering stamps work amazingly well with the Misti Mini Hero Black, so keep the great tool in mind when you get any of the HA Color Layering stamps…
Be aware that my post includes affiliate links, which means that if you click on and shop through them, I will receive a tiny commission from Hero Arts. Thanks!
I used my Misti Mini Hero Black to stamp the wolf and Moon. I used three different colors for the wolf (Soft Brown, Soft Granite, and Intense Black) and two for the moon (Soft Vanilla and Soft Brown). The image is so nice with many details that make it so real!
For the background I used two of the Fancy dies included in the main kit. The mountains were simply die cut from light gray cardstock and the rocks from brown cardstock. This die is actually the die that has a light house, but I trimmed off the light house with scissors and I only used the bottom part as the base for the wolf. The rest, a dark sky, a white embossed sentiment and some sequins.
My second card features three Add-On products: Shine Bright Stamp set, Shine Bright Frame Cuts and the Shooting Star Stencil. Take a look:
For this card I created a subtle background using liquid colors and shaving cream. Then, I used the Shooting Star stencil along with modeling paste to create a dimensional impression of the stencil. I finished it up with some sparkle silk.
The pretty mermaid and dolphin were stamped with different colors of ink also using my Misti Mini Hero Black. I love this tool because you can create ombre effects so easily, and once you have it you want to use it all the time! Finally, I simply included a sentiment over a circle shape, and some sequins.
Hero will give away one $50 gift card, drawn from the comments left across the hop. Enter by Sunday, June 14th at 11:59pm pacific, and the winner will be announced on the Hero Arts blog the following week.
Please be sure to visit all the participants blogs in order to increase your chances of winning:
Hey there! Time is flying and Father’s Day is around the corner so I hope we Hey there! Time is flying and Father’s Day is around the corner so I hope we can celebrate grilling something and making this day special for my husband. Probably all Father’s Day celebrations are going to be different this year (sigh), but we all can make them awesome, don’t you think?
Anyway, I am going to try this month to share more projects in the “masculine category”, so I am going to start by sharing a letter-size layout of my husband and our two sons that I created using FSJ products including some of my favorite embellishments that I always like to use on my scrapbook pages, take a look:
I began by creating the criss cross pattern background with an ink pad over plain cardstock. I matted this panel with a darker color of cardstock. Then, I added a few layers that included a notebook border, a piece of printed paper, a couple of tags, decorative tape and of course some stamped sentiments here and there.
Be aware that my post includes affiliate links, which means that if you click on and shop through them, I will receive a tiny commission. Thanks!
Adding the final touches to my pages (and cards too) is for me, the best part of my creative process. I enjoy choosing and placing all the little details that complete any of my projects. This time, I included some fun paper clips in a shape of a man and glasses, as well as a small wooden arrow, staples, and black thread.
BTW, right now many FSJ products are on sale, so this is the right time to stack on some of your favorite ones…
Happy Tuesday, everyone. Now that I have been enjoying some of my “stay at home time” doing some crafts, I got to play with a Spellbinders die set that I like a lot and it is called Botanical House, so I created this card:
Be aware that my post includes affiliate links, which means that if you click on and shop through them, I will receive a tiny commission. Thanks!
It seems like it was a lot of work but it really wasn’t at all. It was like playing with a little puzzle.
I began by die cutting the house using four different colors of cardstock and Whip Cream. I used a piece of a dryer sheet under the cardtstock to help keep all the pieces in their place after die cutting them. It also helps to obtain a clean cut.
Then, I adhered the Whip Cream house over a piece of a FSJ White Liner Sheet. I trimmed around the house and then I adhered all the pieces to fill in the house. No particular order for the colors or pattern, I just had fun mixing the colors.
After that, I placed the card over a Whip Cream panel. Next, I used a a die and stamp set called Hello Expressions to make the sentiment.
I complemented with a couple of leaves, a tiny flower and a white gem. Finally, I adhered the panel over a folded card with foam squares. This card was fun to make, but I couldn’t expect less since this Botanical House is so pretty and fun to play with!
Hello friends! It has been a long quarantine here in Illinois but my crafts and my coffee keep me strong 🙂 So, today I have a quick post just to share a card that I made using Fun Stampers Journey products. The set that my card showcases is called Coffee Helps (and sure it does), take a look:
Be aware that my post includes affiliate links, which means that if you click on and shop through them, I will receive a tiny commission. Thanks!
I began by creating the background of the card which is a fun easy way to use Liquid Colors and I made a quick video of how to do it, check it out:
Then, adhered the background over a folded card. I stamped the coffee cups onto different colors of cardstock and die cut them with their matching dies. Notice that I stamped the heart of the light blue cup on the other two colors too. I adhered the cups over the card with foam squares, and I also stamped the sentiment. I fussy cut the two extra hearts and adhered them over the other two cups, then I colored them with Candy Apple Liquid Color. Finally, I simply added Journey Glaze details, which always make your cards stand out 😉 .